Convenda - Administration
Sign in as admin
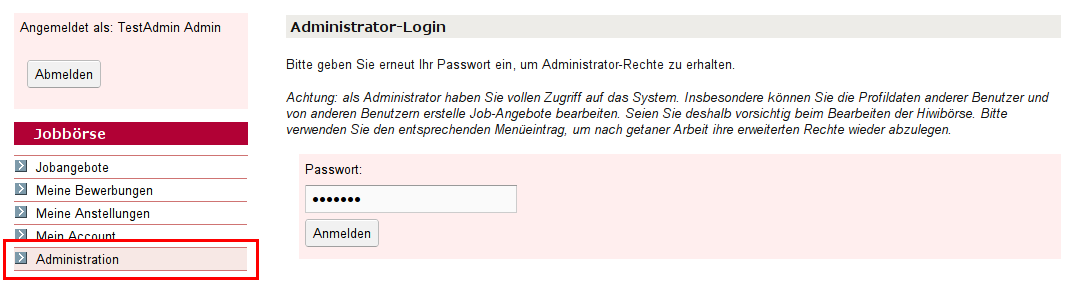
If you have administrator rights, an additional entry "Administration" appears in the menu. Click on this menu item. The administrator login screen appears. You will be asked to enter your password again. Enter your password in the corresponding input field and click on "Login". You are now logged in as an administrator and have access to special administrator functions.
Sign out as administrator
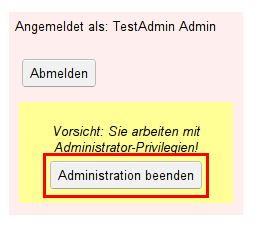
After you have completed your administrative tasks, you should discard the administrator privileges. To do this, click on the button "Administration beenden", which is displayed below a warning notice in the menu bar.
After you have discarded your administrator privileges, you can continue to use the system as a normal user.
Manage users
Click on the menu item "Benutzer verwalten" (only displayed if you are logged in as administrator, see here). A tabular list of all users registered in the system appears. You can search for a specific user by entering parts of the name or the e-mail address in the search field. You can also toggle the sorting of the list.
The table shows the user's first and last name, email address and user role (student, staff member or editor). Users who have administrator rights have the addition "(administrator)" next to their user role.
An icon shows the account status for each user. The different icons mean:
“Account aktiv”: The account is active and can be used.
“Account gesperrt”: The account has been locked by an administrator and cannot be used.
“Benötigt Bestätigung”: The user wants to register as a staff member or administrator and needs to be confirmed by an administrator before they can use their account. Click the edit icon to unlock the account (see here).
“Nicht aktiviert”: The user has registered via the registration form but has not yet clicked the link to confirm their email address. The account cannot be used until the user calls up the activation link. However, you can activate the account manually by clicking on the edit icon (see here).
Click on the icon to edit a user account.
Edit user account
Click on the icon in the list of users to edit the user account. You can edit all the user's data. You can also change the user's role if, for example, a staff member has mistakenly registered as a student. If you select a new user role, you must first apply this change before you can continue editing, as different information is stored for each user role (e.g. a staff member does not have a matriculation number).
At the bottom of the page, you have the option to lock the user's account. A locked account cannot be used until it is unlocked. To lock the account, simply click on the button "Account sperren". The change is effective immediately. If the user is logged in to the system at that time, he or she will be logged out automatically. It is not possible to lock your own account.
To reactivate a locked account, click on "Account entsperren". The change is effective immediately. The account can now be used again.
If a user registers as a staff member or editor, you must first confirm the registration before the account can be used. To do this, click on the button "Registrierung bestätigen" which is displayed for this purpose. The account of the staff member or editor is now activated and can be used.
Users receive an activation link during registration to confirm their e-mail address. The account cannot be used until the activation link has been called up. However, you can also activate an account manually. To do this, click on the button "Account aktivieren", which is displayed if the e-mail address has not yet been confirmed.
Manage documents
You can store documents in the system that are added to a hiring process by the agents. These documents are the documents and forms necessary for the hiring process. For each document, you can enter a name and a URL where the document can be downloaded. You can also group documents into so-called "Dokument-Sets". Document sets make it easier for the editor to select the right documents. For example, you can create a prefabricated document set for the new setting or reinstatement.
Click on the menu item "Dokumente verwalten". An overview of the documents and document sets stored in the system is displayed.
In the upper part of the page you will see a list of documents with title and URL. You can delete documents by marking them and clicking on the button "Markierte Dokumente löschen". Note that you cannot delete documents that are currently in use in an ongoing hiring process.
To create a new document, enter the name and a URL in the appropriate fields and click "Ok".
At the bottom of the page you will see the document sets that have been created. To add documents to a set, select the corresponding set from the list. Now you can select the documents contained in the set next to it. Select all the documents you want to add to the set and then click on "Save selection". You can undo your changes that have not yet been saved by clicking on "Auswahl zurücksetzen".
To create a new set, enter a name in the corresponding field and click on "Ok".
Manage institutes / study subjects
Staff and agents can select a department or institute they are responsible for when registering. Students can select from a list of degree programmes when registering. Here you can manage the list of institutes and degree programmes.
Click on the menu item "Institutes / Study programmes". An overview of the institutes and degree programmes stored in the system is displayed.
You can add a new department by entering the name of the department in the text field and confirming with "Ok". You can delete departments by marking the departments and clicking on the button "Delete marked entries". Please note that you cannot delete a department as long as it still has a member of staff or as long as there are still vacancies advertised for this department.
Similarly, you can manage the degree programmes in the lower section of the page.
Edit standard contract
The "Normvertrag" defines the standard duration and the number of working hours for all job offers. The values entered here are used when creating a new job offer. However, changes are not applied retroactively to already created job offers.
Click on the menu item "Normvertrag". The currently set contract duration and number of hours are displayed.
Enter the desired values and click on "Ok" to save. You can undo any changes you have not yet saved by clicking on "Reset".
To create a new standard contract, click on the entry "Normvertrag".
Here you can see all the standard contracts that have been created so far. If you click on an existing one, you can edit it as you wish.
If you want to create a new standard contract, first enter the corresponding name in the lower dialogue box and then click on "neuen Normvertrag erstellen".
After the new standard contract has been created, you can edit it as you would any other standard contract.
Now you, or the corresponding coordinator, can select the standard contract for a coordination area. It appears in the tab bar "Mein Koordinationsbereich" under the section Standard Contract.
Please note that changes to a current standard contract can change the default values, but not values that deviate from this standard.