Activity Presence

The Moodle activity Attendance can be used to record the attendance of students at a course. There are two options: On the one hand, the teacher can enter attendance in digital attendance lists, on the other hand, students can also record their attendance themselves.

Target Group
Lecturers & Students

Objectives
Practice & Testing

Further Documentation
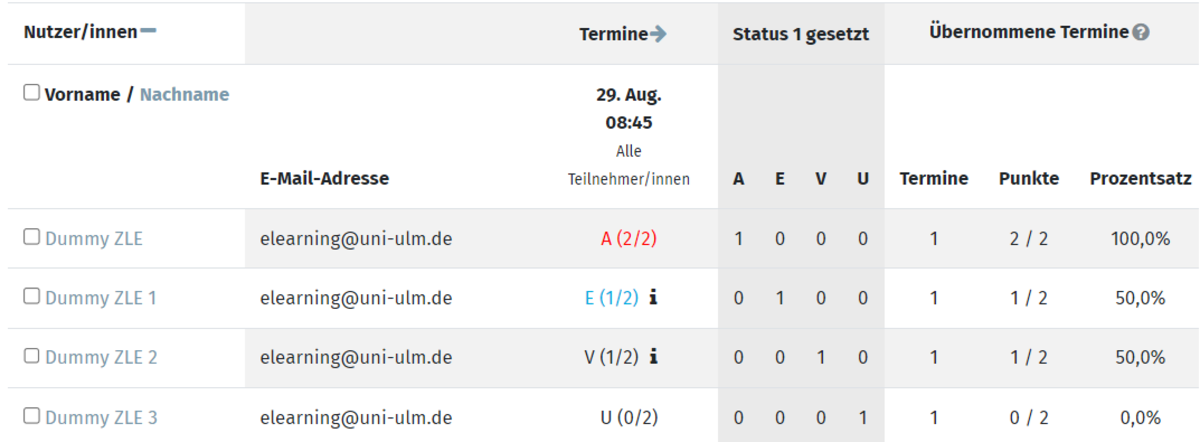
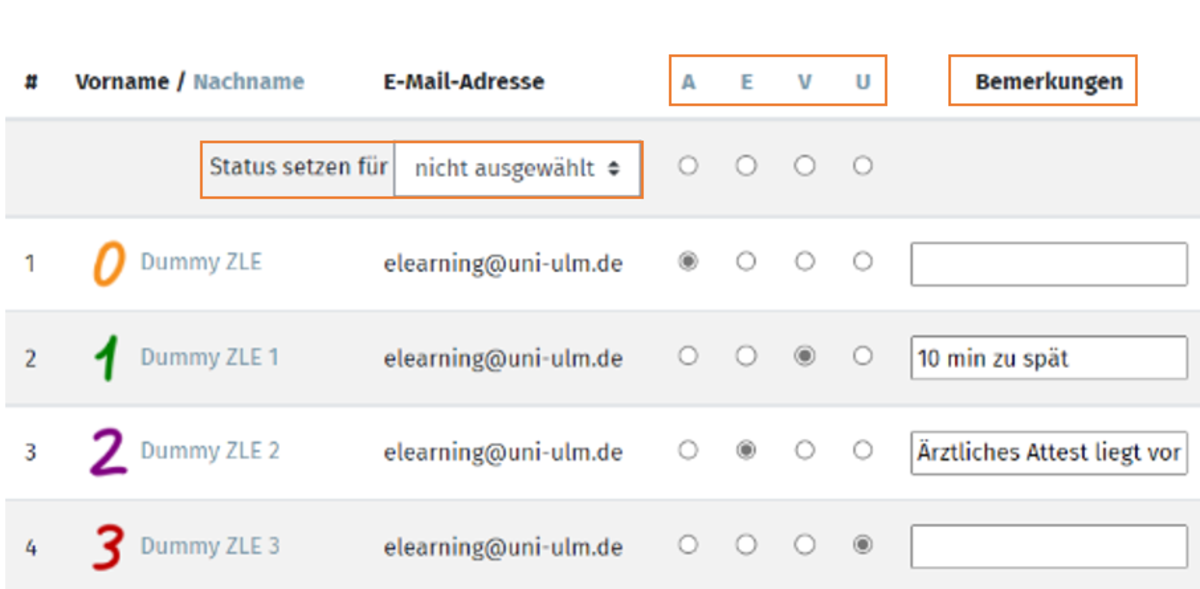
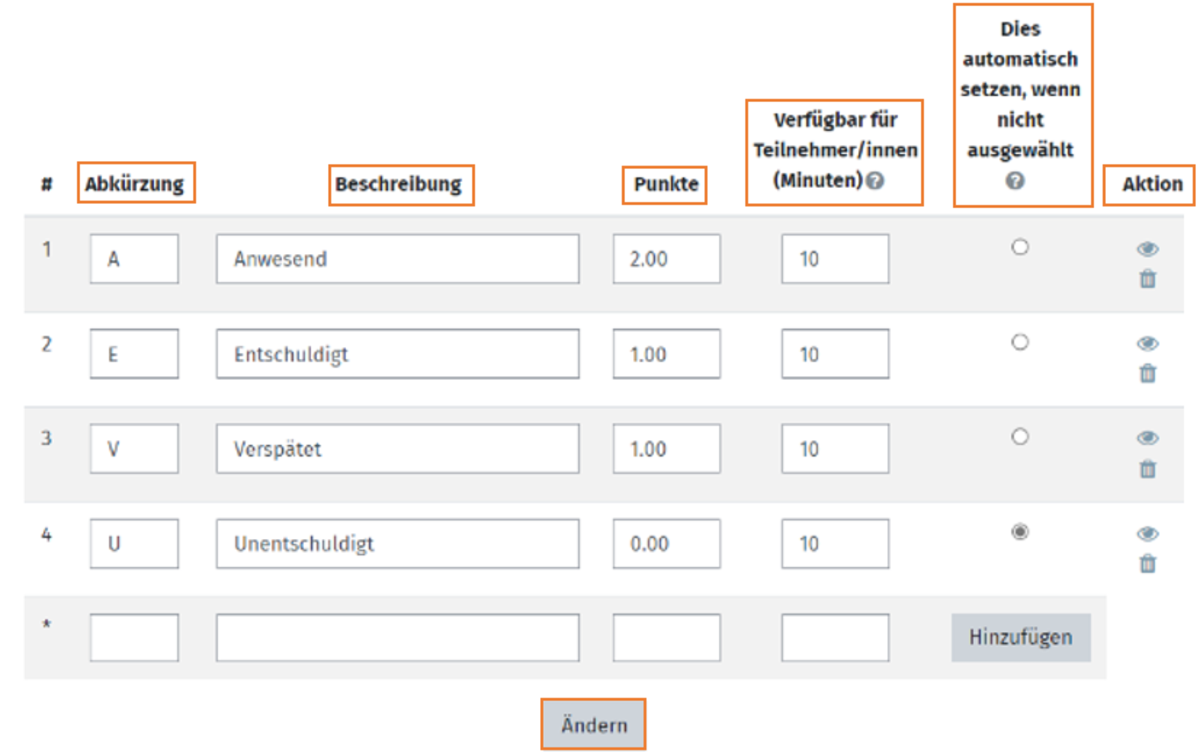
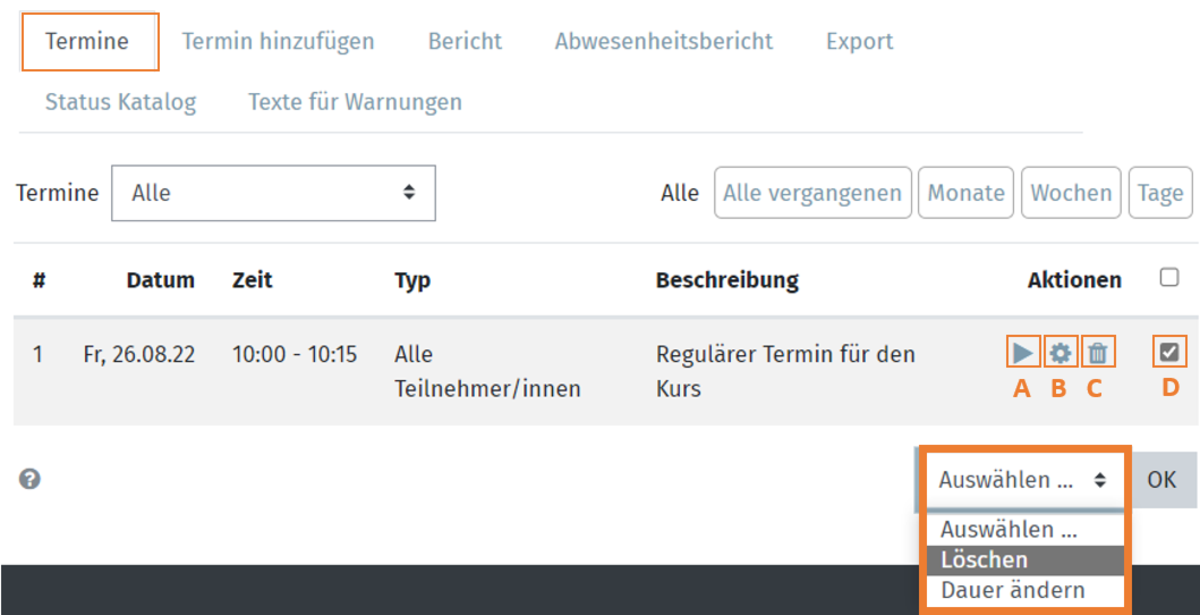
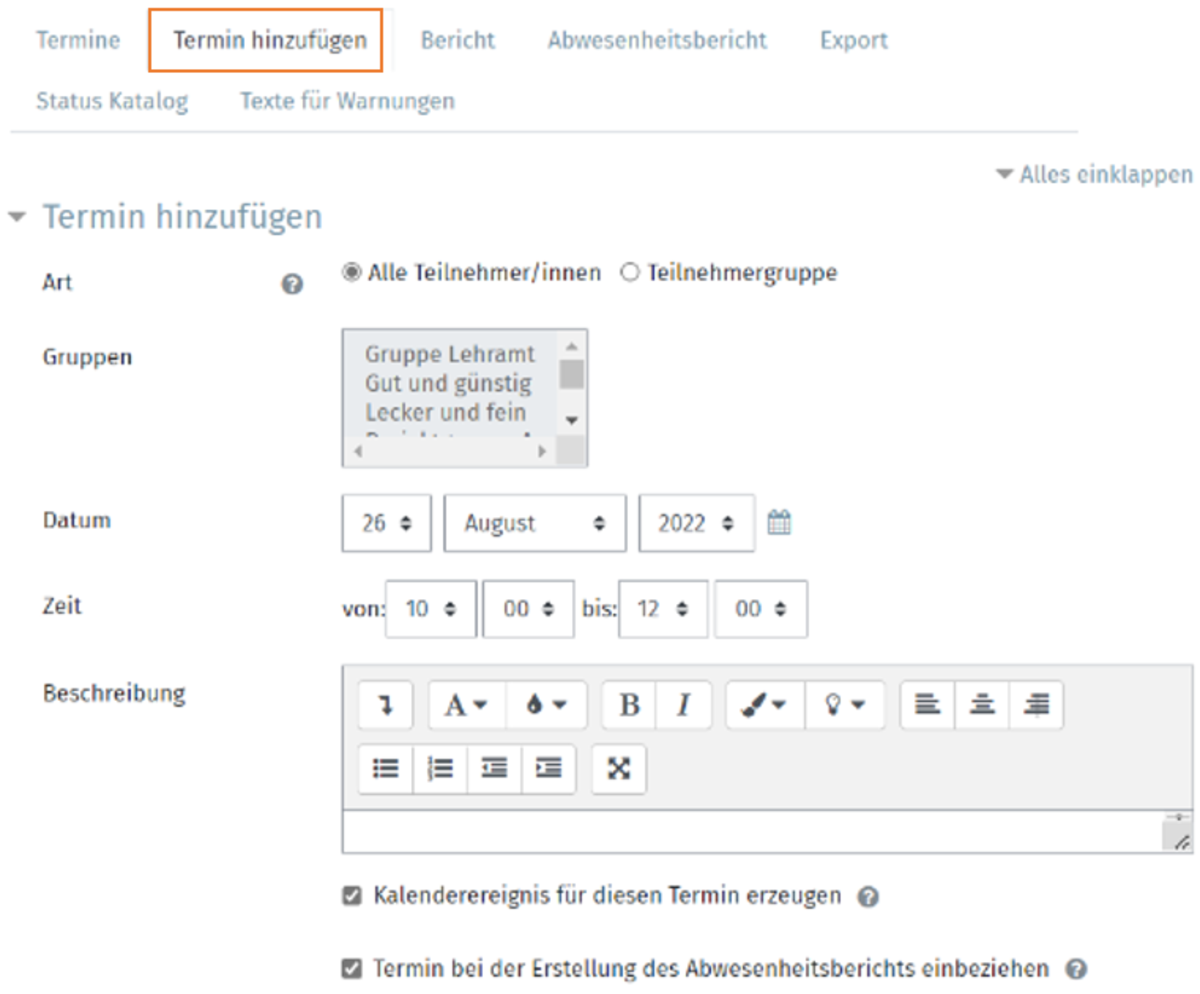
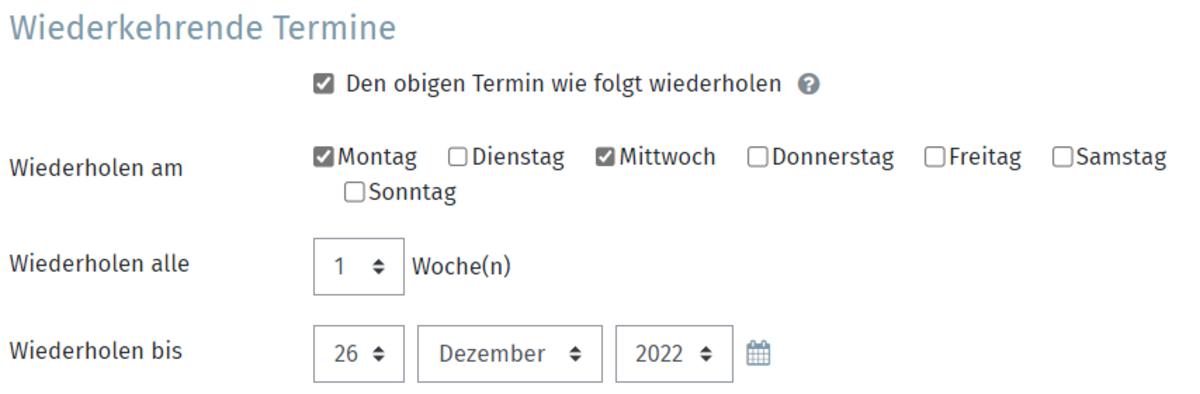
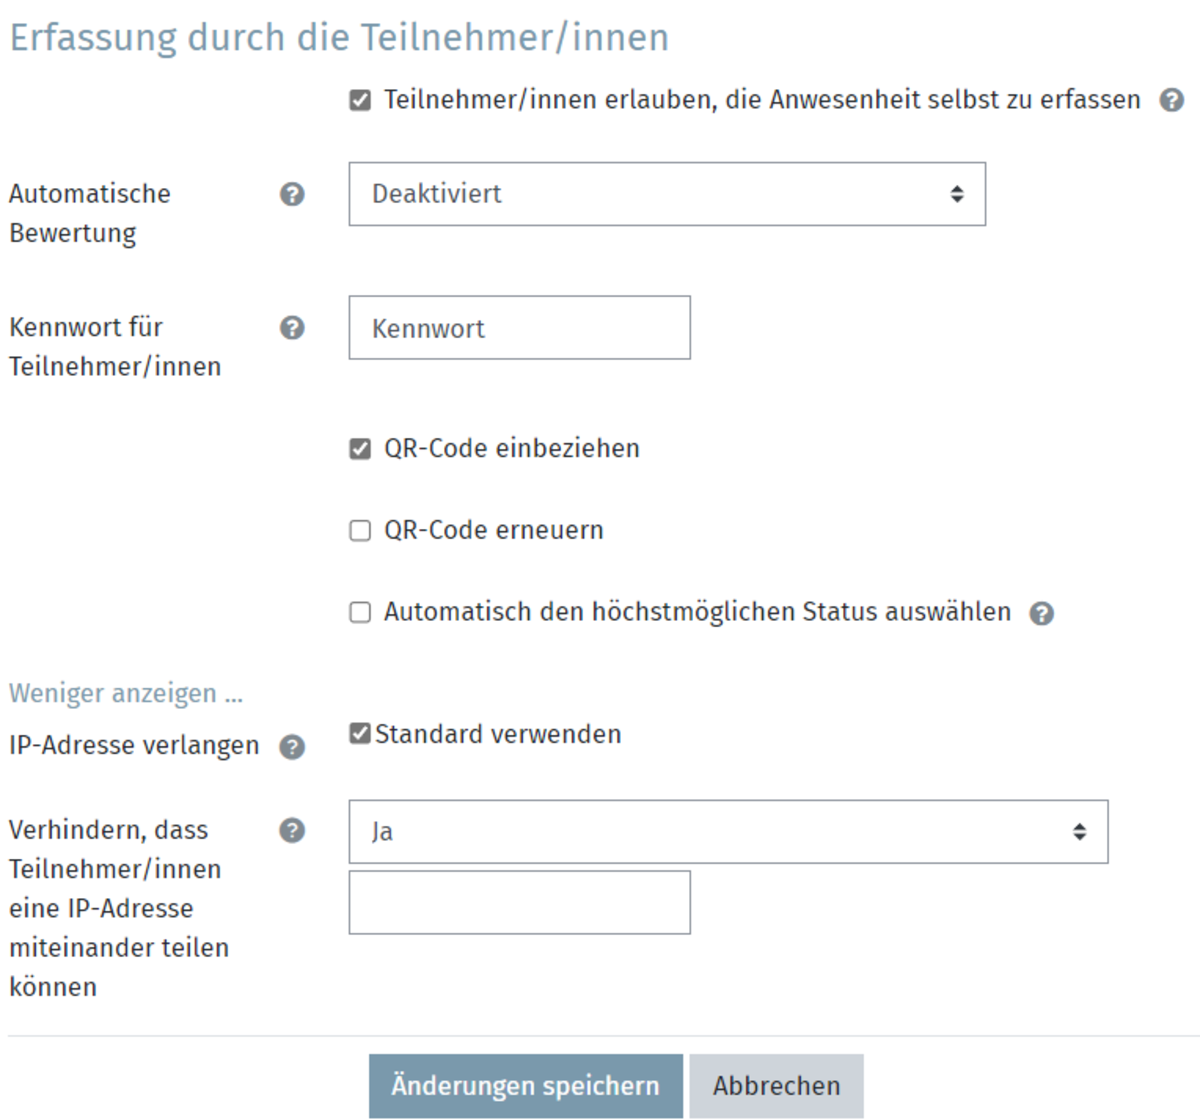
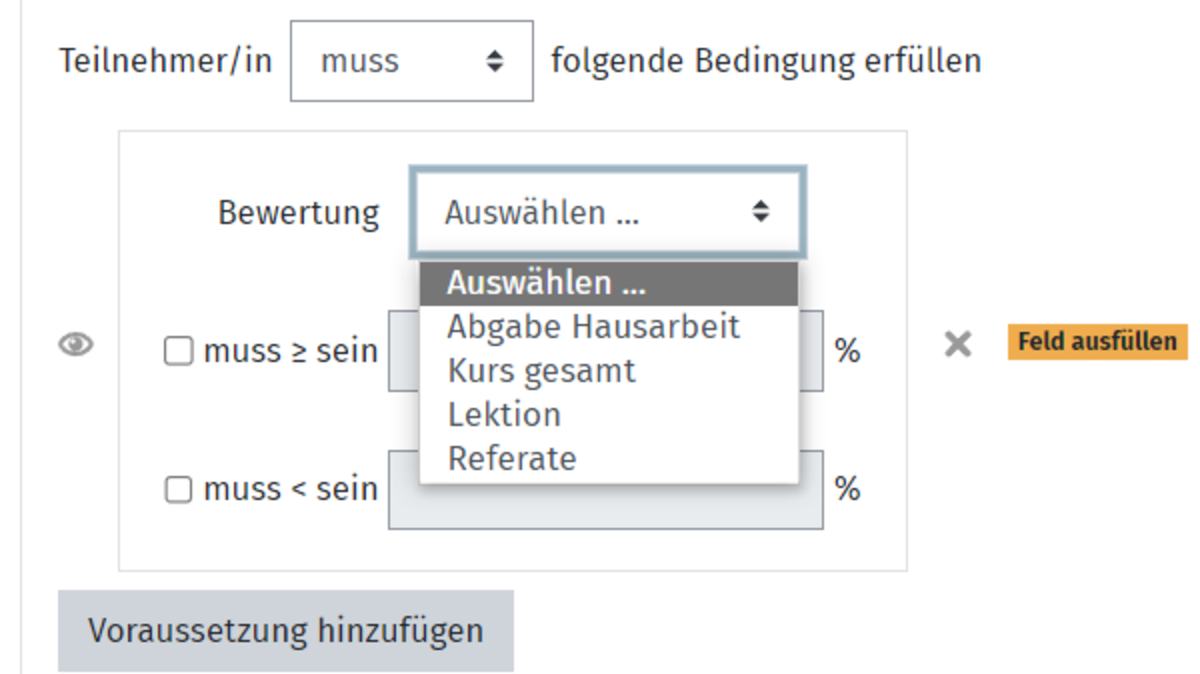
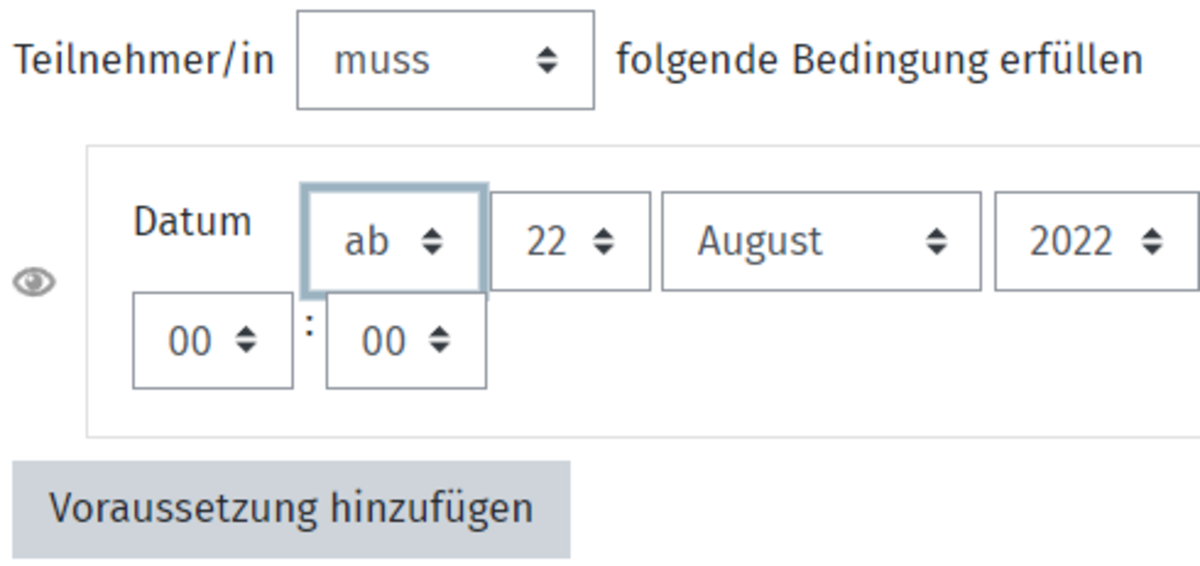
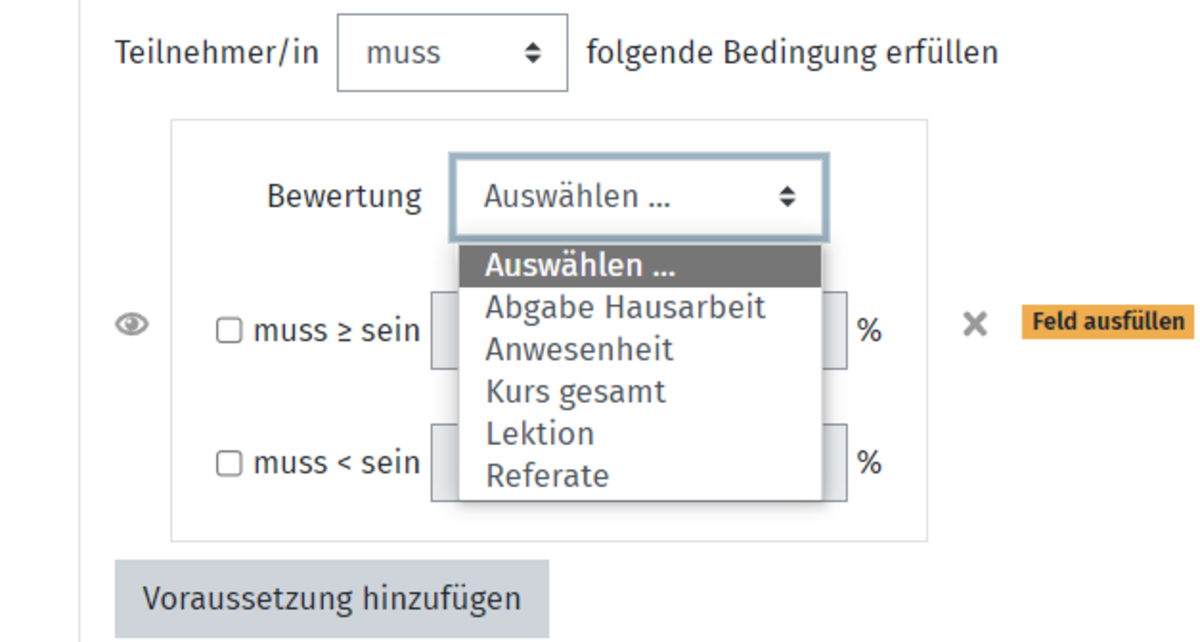
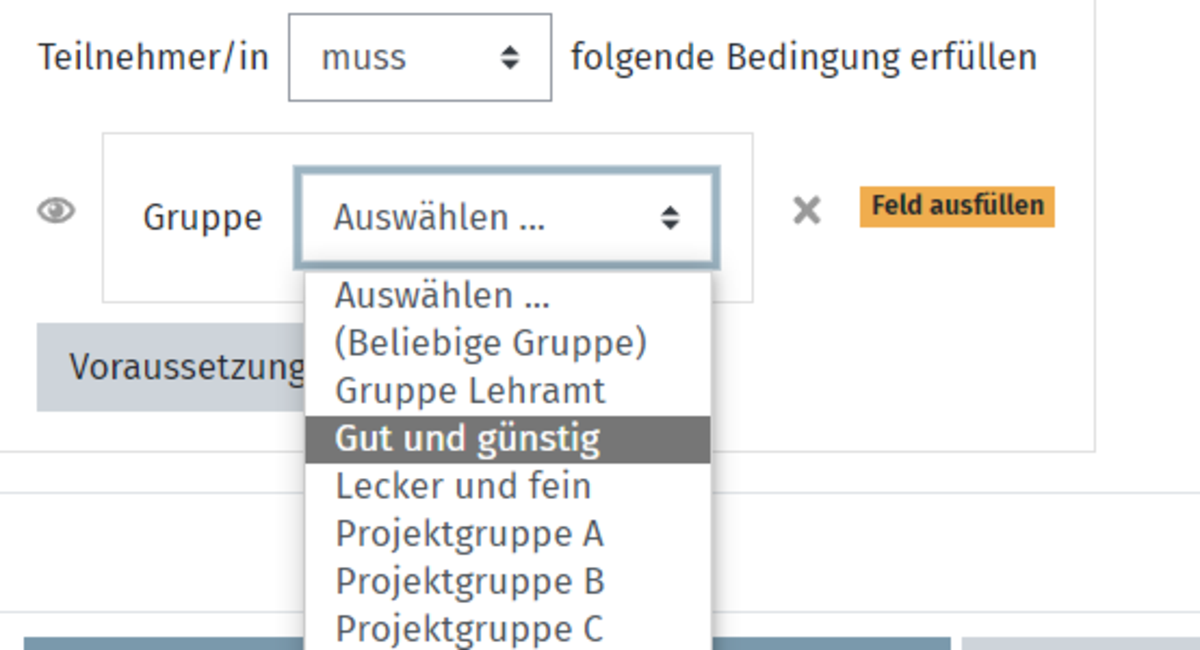
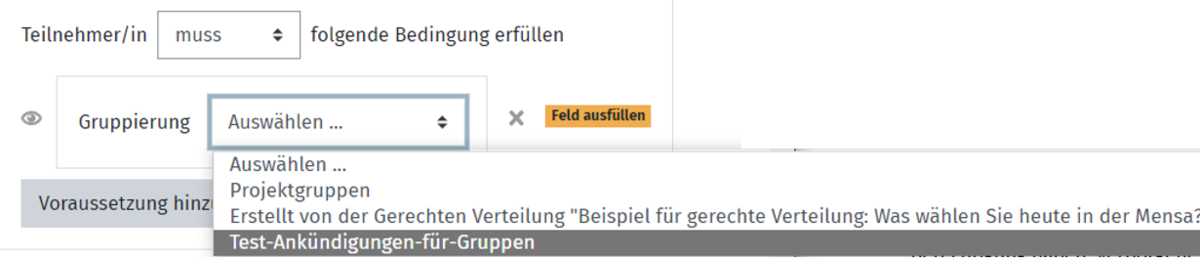
Moodle Basics – Recording Attendance

Moodle Version
Article based on
Moodle version 3.2

Author
Carolin Hecht
ZLE - Center for Teaching Development

Context
Activities & Materials

License
This article is licensed under a Creative Commons license
All information about the license

Help, questions, suggestions

If you need further help* on this topic, have any questions or suggestions, please feel free to contact us at any time!

*Haveyou already thought about looking for help or a solution in our help pages on these pages or in the Moodle documentation (see above or https://docs.moodle.org/)?

Lizenz

Creative Commons License Agreement 
Texts and images in this article are licensed under the Creative Commons license CC BY 4.0

Attribution for reuse:
"Activity: Attendance" by Carolin Hecht (Ulm University), licensed under CC BY 4.0

Overview of attendance

As a teacher, you can get an overview of the attendance of all appointments. To do this, click on Report in the tab. The participants are then listed, together with the status values for the individual dates and the points achieved for the activity. Under the column for the relevant dates, you will also find a summary of how many participants were present, excused, late or unexcused at the event.

Record attendance by participants

If participants are to record their attendance themselves, they must log in to Moodle, select the course, click on the attendance activity created and click on Record attendance for the relevant date. A window then opens where the password must be entered and a corresponding status value can be selected.

If you have restricted access using a QR code , you must make the QR code available during the event. This will be scanned by the participants, who will then be automatically forwarded to the event. The password is usually filled in automatically when the QR code is scanned. Students then only have to select a status value. If you selected Refresh QR code when creating the appointment, the QR code is refreshed every 60 seconds to enable attendance recording. This is to prevent students from forwarding the QR code and thus registering students who are not present.

Record attendance by teacher

To record the attendance of an appointment, search for the corresponding appointment in the Appointments tab and click on the arrow symbol under Actions.

A table is then displayed in which all participants in the course are listed. Here you can set a status value for the event for each participant. You have previously created the possible status values in the status catalogue. To set a status value, click on the radio buttons for the desired status. You also have the option of adding a comment . If you would like to set the same status for all participants, you can also select Set status for all and then select the desired status value. Finally, save your entries by clicking on the Save attendance button at the end of the table.

Status catalogue

Under the Status catalogue item in the tab, you can change the status values for recording attendance. Here you can insert an abbreviation for a status value and its description. For example, the abbreviation A stands for the status value Present. For the evaluation , you can enter achievable points for each status value here. You can also hide or delete status values. You will find the option for this on the right under Action.

You can now decide whether and for how long after the start of the event participants can record their attendance. To do this, enter a desired number in the input fields under Available for participants (minutes). If you enter the number 0, the option to enter status values for participants will not appear. All numbers above this indicate the duration in minutes for which attendance can be recorded by participants after the start of the event. In the Set this automatically if not selected column, you can select a status value that will be set automatically if no status value is selected by the participants. Finally, save your settings by clicking on the Change button.

Edit appointments

The created appointment now appears in your appointment tab. Clicking on the triangle (A) under Actions will take you to the attendance recording of the participants for this appointment. You can also edit created appointments at any time and change individual points. To do this, click on the cogwheel (B) of the relevant appointment under Actions. To delete the appointment, click on the rubbish bin symbol (C). If you want to delete several appointments, select the desired appointments by ticking the box on the far right (D) and then selecting Delete from the drop-down menu. Confirm with OK.

Create appointments

After creating the Attendance activity, you have the option of creating appointments for which the attendance of the participants is to be recorded. To do this, click on Add appointment in the tab.

You can then select whether the appointment is for all participants or only for a group of participants. You can also select the date and time and add a description of the appointment if required.

If the created appointment is a recurring appointment, you can specify in the Recurring appointments section when the appointment is to be repeated and how often.

You can allow participants to change their attendance status themselves under the item Attendance recording by participants .

Access to the attendance recording can be restricted if you set a password or generate a QR code that must be scanned by the participants. If you click on Show more, you can set that only one attendance can be recorded from one IP address. This means that you cannot log in several participants from one device in succession and thus enter participants as present who are not present.

Activity completion

The last menu item is Activity completion. Here you can specify whether the completion of the activity on the participant's course page is marked manually or automatically after all conditions have been met. You can also set a desired date for the completion of the activity.

Then save your settings with the Save and display button.

Prerequisites

In the next section, Prerequisites, you can create the prerequisites for accessing the activities. Here you have nine different options from which you can select one or more.

Further settings

You can specify the availability in the Additional settings section. Here you again have three options:

  • Show on course page: The activity is available for participants. However, please note that availability may be restricted due to access restrictions.
  • Hidden from students: The activity will only be available to those who are authorised to view hidden activities.
  • Available but hidden on course page: this option is useful if the course has many activities and materials, as it makes the course page clearer. If you select this option, a link to the activity must be created.

Valuation

In the next section, Rating , you can select a type of rating to be used for the activity. There are three options: scale, point and none. For Scale , you can select the scale from the drop-down menu. For Points , you can enter a maximum number of points that can be achieved. If you do not want to rate the activity, select None .

If you have decided in favour of a score, you can then define a pass mark that must be achieved to pass the activity.

General information

To create the attendance activity, activate the edit mode on your Moodle page. You will find the corresponding button at the top right of your page. Then go to the course section with the course and click on Create material or activity. From the options that appear, select Attendance.

On the page that now appears, first fill in the mandatory fields under the General menu item. These are marked with a white exclamation mark in a red circle.

Use Name (A) to give the activity a name under which it will be listed in your catalogue.

Under Description (B) , you can create a description for the activity. This is optional.