Question type: Arrangement

One type of question available in Moodle that can be used for tests is the 'Order' question.

This question type can be used when items need to be put in order.


Target Audience
Instructors

Objectives
Practice & Assessment

Additional Documentation
Moodle Docs: Ordering

Moodle Version
This article is based on
Moodle version 4.1

Author
Judith Rechsteiner, Kristina Busch, Carolin Hecht
ZLE – Center for Teaching Development

Context
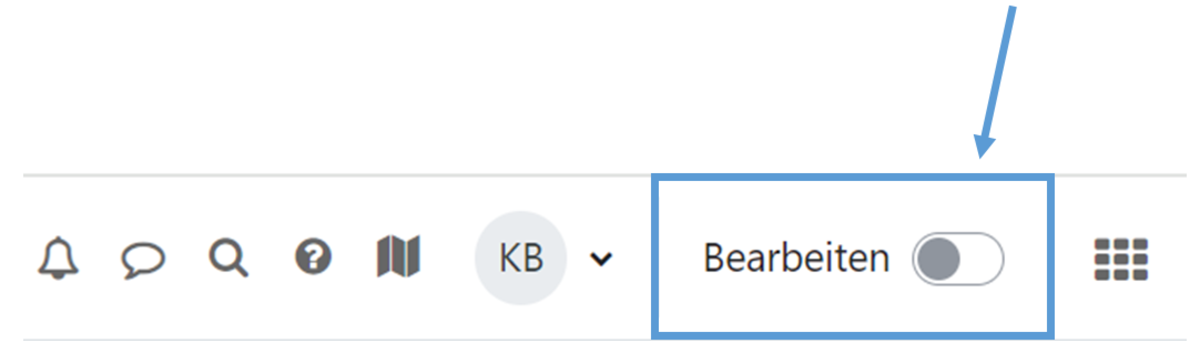
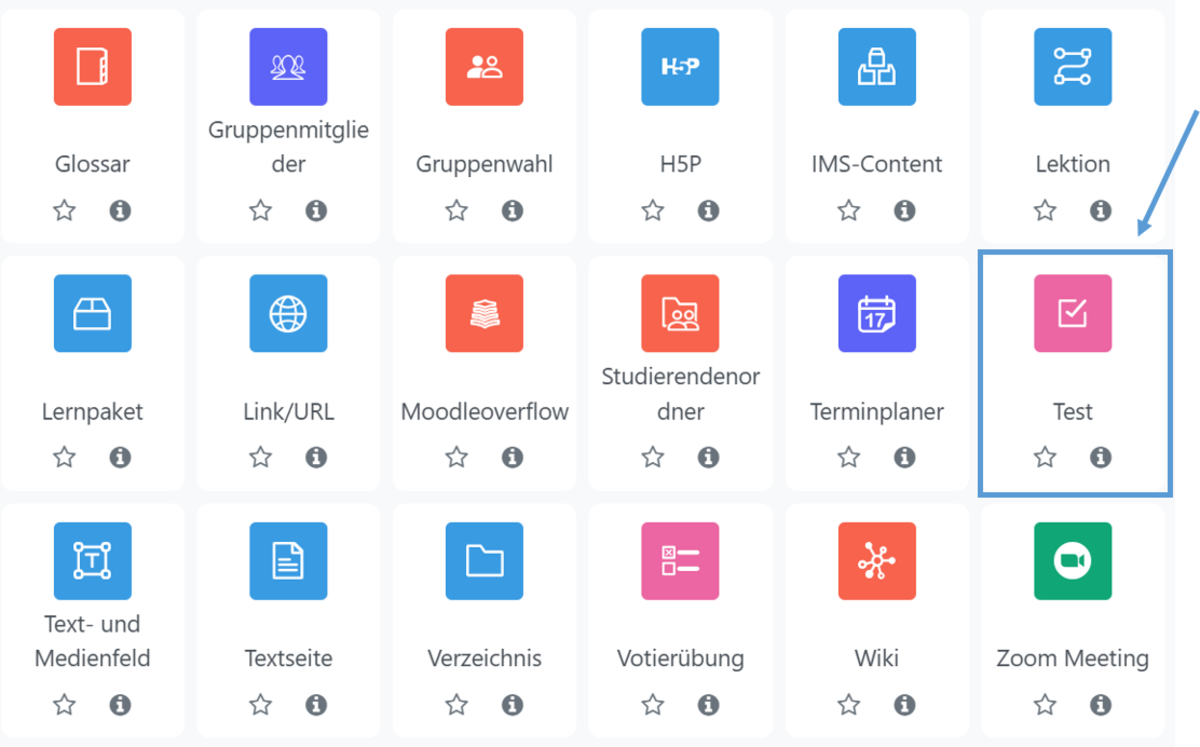
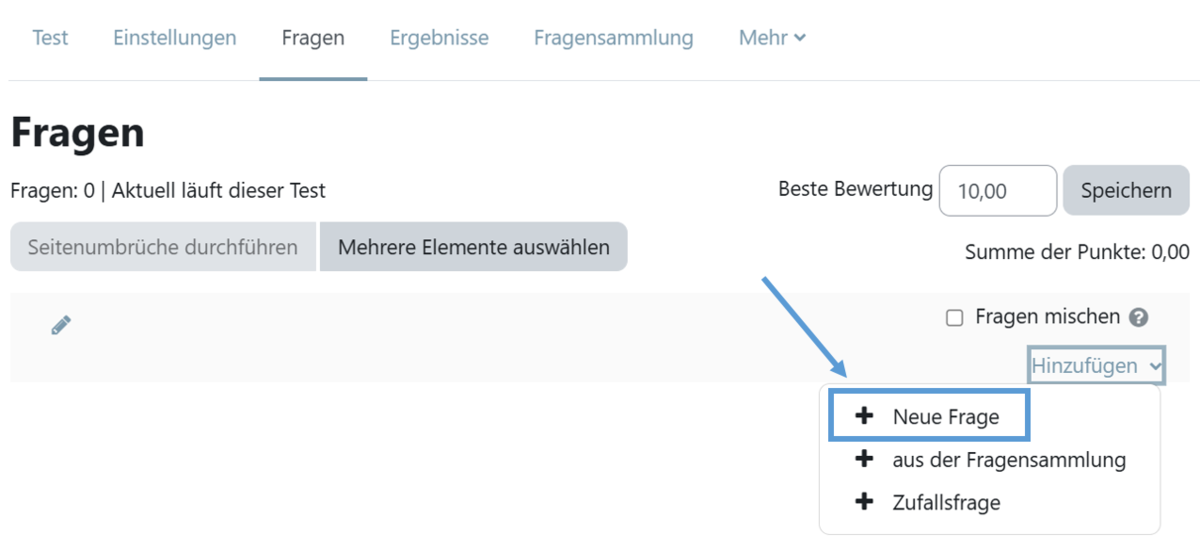
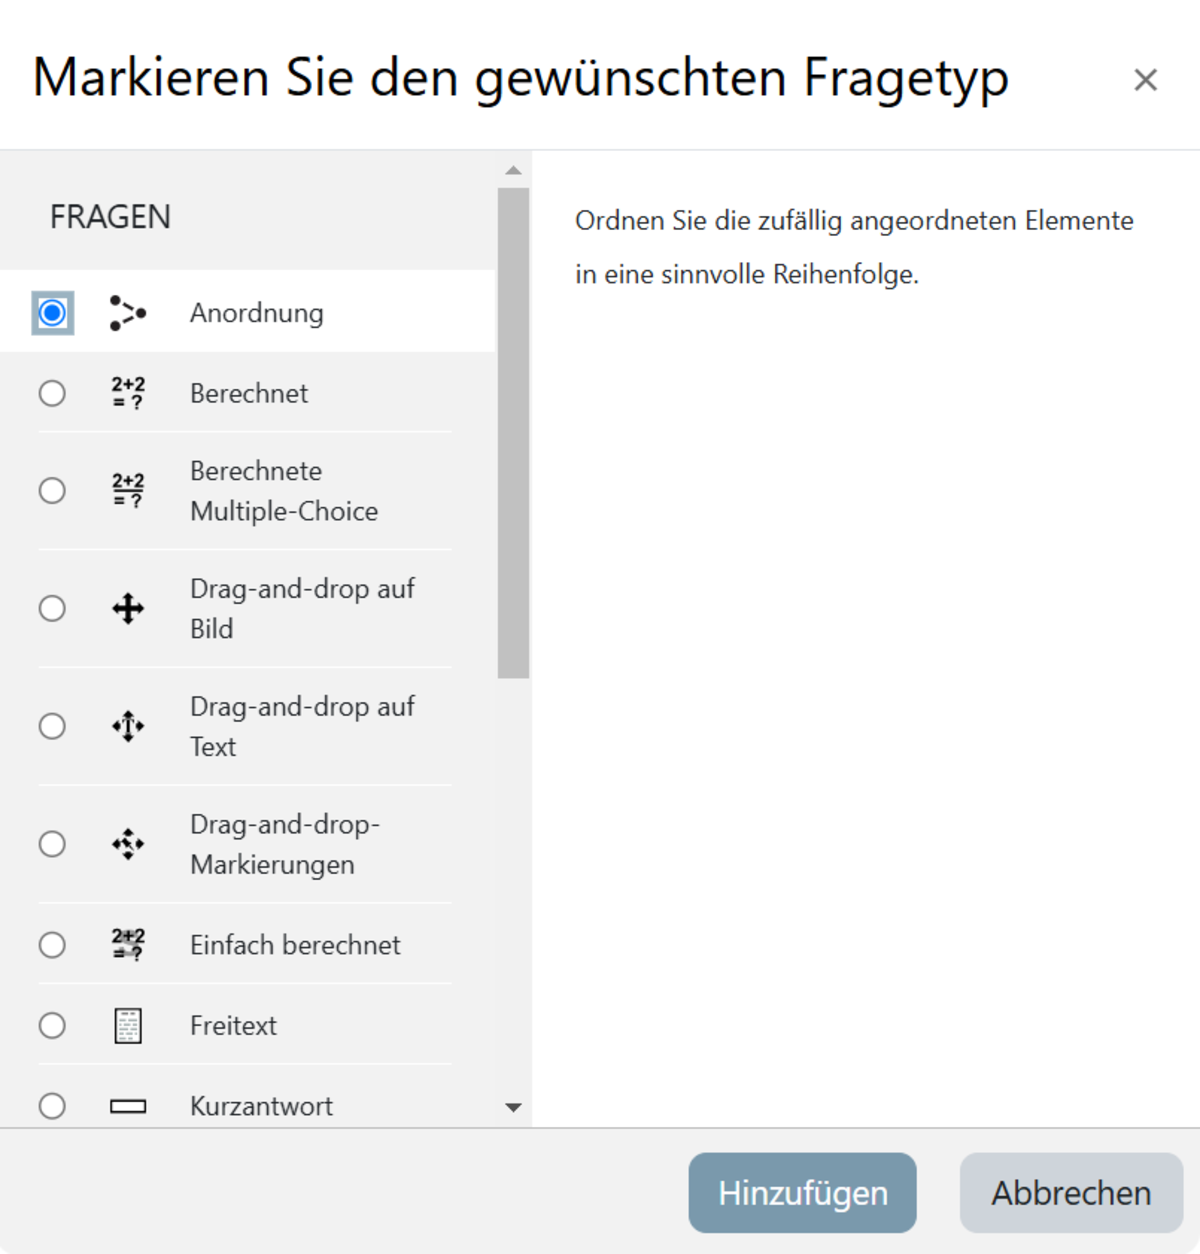
Activities & Resources > Quiz Activity

License
This article is licensed under a Creative Commons License
All information about the license

Prerequisite: Test

To add the 'Set' question type to a test, you must first have created the 'Test' activity in the course.

To do this, switch to edit mode (Fig. 1).


Create the 'Test' activity by first clicking on 'Create activity or resources' (Fig. 2) and then selecting 'Test' (Fig. 3). Then enter a name for the test and save.


Open the test and select Add question (Fig. 4). On the new page, select Add and New Question (Fig. 5). You can now select a specific question type from the list. Here, select the question type Order (Fig. 6). Confirm your selection by clicking the Add button.

Figure 1
Figure 2
Figure 3
Figure 4
Figure 5
Figure 6

Set general preferences

On the page that now appears, start by filling in the mandatory fields under the ‘General’ menu item (Fig. 7). These are marked with a white exclamation mark inside a red circle.

In the ‘Question title’ field, give the question a name under which it will be listed in your question catalogue. Under ‘Question text’, enter the instructions for your students. This is the task text. Your question should ideally be formulated in such a way that participants can provide an answer by submitting a file or entering text.

You can then set the points available for a correct answer to the question and provide general feedback. The general feedback is displayed to participants after they have answered the question, regardless of the result.

When arranging the elements, you can also choose whether they should be arranged horizontally or vertically (Fig. 8).

Under ‘Element selection type’, you can choose whether all elements are selected for the question, a random subset, or a subset of related elements (i.e. a group of specific elements). If you opt for a subset, you must then specify how large it should be. If, for example, you select five elements, the participants will also be shown five elements in the question.

You can then specify the marking scheme. This allows you to decide how the answers will be marked if the students have not arranged all the elements correctly. You have several options to choose from here. You can find a detailed explanation of the individual options by clicking on the question mark to the right of ‘Marking scheme’.

In the next step, under ‘Marking details’, you can determine whether participants can see the details used to calculate the score or not.

You can also specify whether and how the elements should be numbered.

Figure 7
Figure 8

Insert movable elements

Once the general settings have been defined, you can edit the ‘Movable elements’ menu item (Fig. 9).

Enter the movable elements here that the students will work with later in the test. You can create as many elements as you like. However, it is important that you enter only one element per movable element. You can then select the format of the element.

Note: You should enter the elements in the order in which they are to be marked as correct later (Element 1 = 1 in the sequence).

Empty element fields have no effect and will not appear in the quiz question.

Feedback and comments

Under the ‘Combined Feedback’ menu option, you can enter feedback that will be displayed to participants alongside the relevant answers (Fig. 10).

Under the Multiple Attempts menu item, you can create notes that are displayed to participants after an incorrect answer. You can also specify how many points are deducted after an incorrect answer

Please note: To use this option, the test must be conducted in either Multiple-choice with hints mode or Multiple-choice (with deductions) mode.

Figure 10

Result

If you want to check what the question type you have created looks like in the test, scroll to the bottom of the page and click on the ‘Save and continue editing’ button. This will save your work so far, and the ‘Preview’ button will appear next to the ‘Save and continue editing’ button. If you click on it, a new window will open showing the question exactly as it will appear to students in the test. You can also edit the question here yourself (Fig. 11).

Figure 11

Help, questions, suggestions

If you need further help* on this topic, have any questions or suggestions, please feel free to contact us at any time!

*Haveyou already thought about looking for help or a solution in our help pages on these pages or in the Moodle documentation (see above or https://docs.moodle.org/)?

Lizenz

Creative Commons License 
The texts and images in this article are licensed under the Creative Commons License CC BY 4.0.

Attribution for reuse:
"Question Types: Ordering" by Judith Rechsteiner, Kristina Busch, and Carolin Hecht (Ulm University), licensed under CC BY 4.0.