CloudStore Guide
The contents of this guide:
- The workspace
- Sharing files
- Working with files
- Collaborative work I and II
- Working with tags
- Circles
- Settings
What is the CloudStore?
CloudStore is an online storage service based on Nextcloud. The system is operated by the kiz on servers at the University of Ulm. For users of the university, this offers a data exchange service with the possibility of synchronising data between different devices, but also users. Access is cross-platform via web browser or via special client applications that are available for various operating systems, including mobile devices such as tablets and smartphones. In addition, text documents, tables or presentations can - with certain restrictions - be edited together on the web. If your questions or problems are not addressed in this document, please contact the Helpdesk.
The CloudStore services include, among other things:
- Sharing documents of any type across the university or with external parties
- Collaborative work on documents
- Automatically delete documents after three or seven days
- Tags for filtering
- Storage volume of 20 GB
- Encrypted data transfer.
Accesses to the CloudStore:
- Access via a web interface (WebDAV)
- Software clients for iOS and Android
- Desktop clients for Windows, MacOS and Linux.
Log in to the CloudStore of the University of Ulm at https://cloudstore.uni-ulm.de (see picture opposite).

The workspace
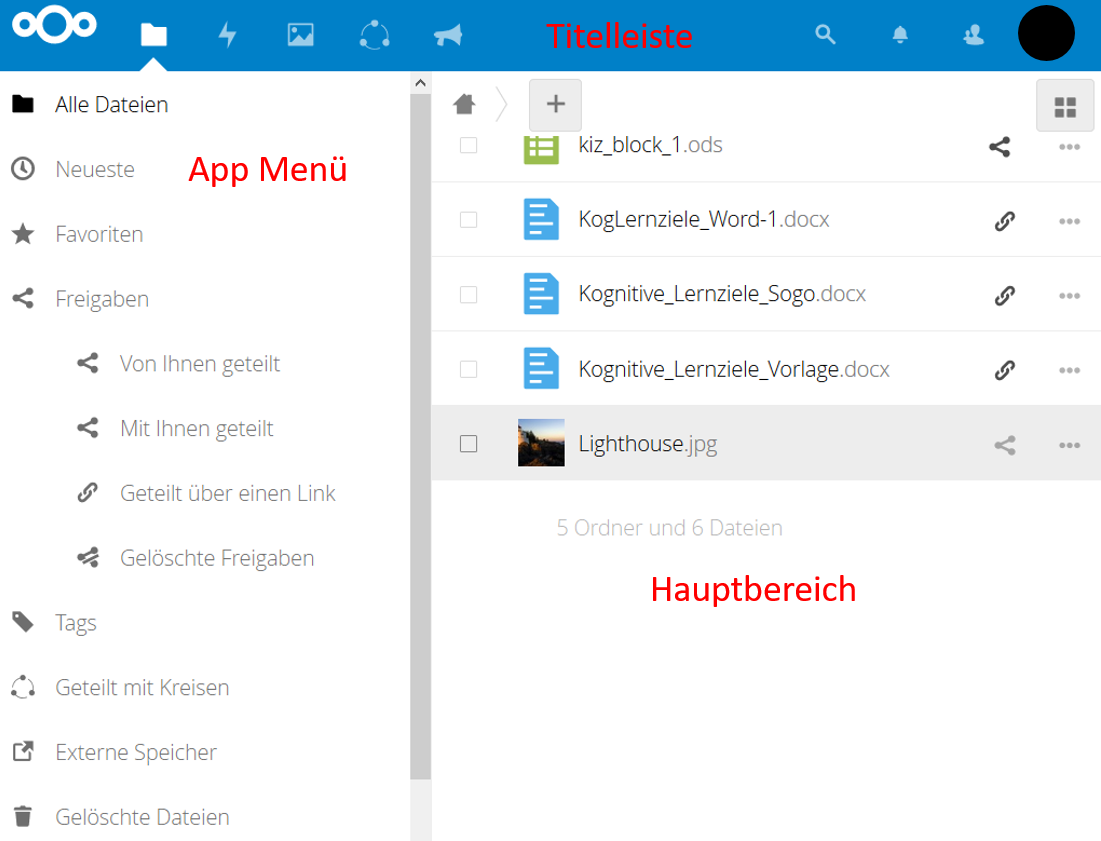
The workspace consists of the title bar, the main area with the documents and the app menu (1).
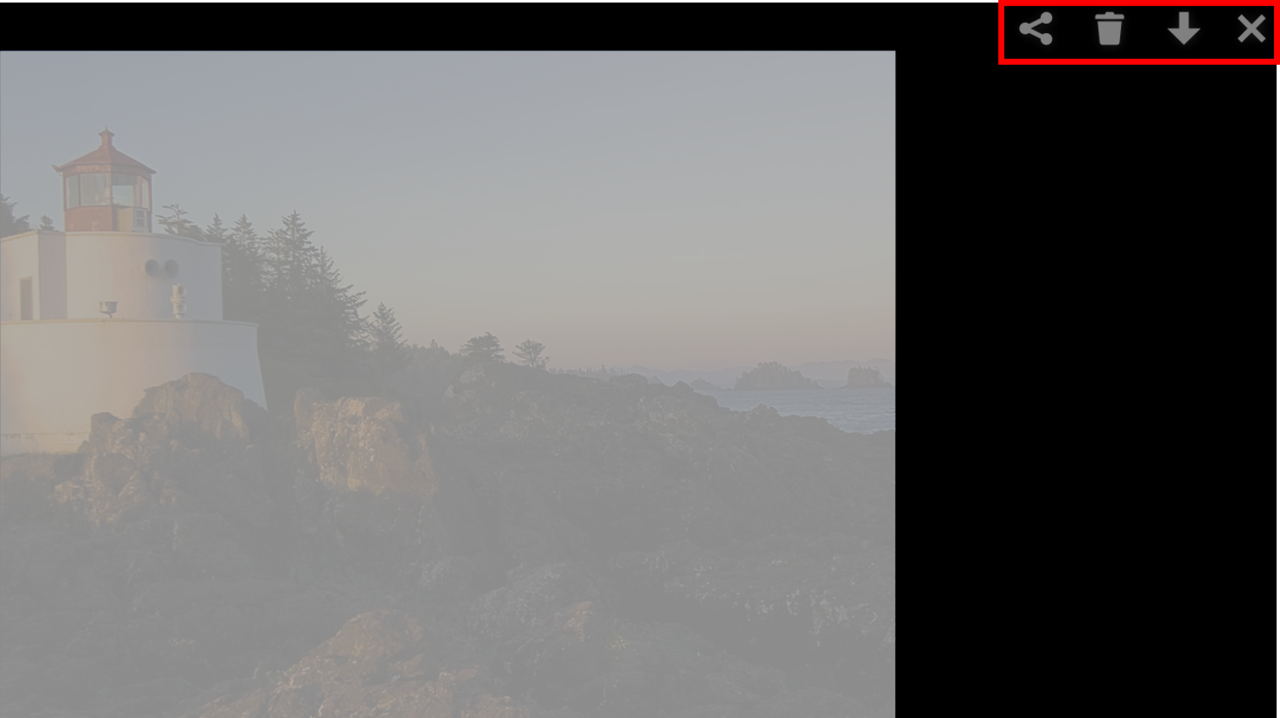
When clicked, the object is displayed, here: a picture (2). It can be shared, deleted or downloaded. The display is closed again with X.
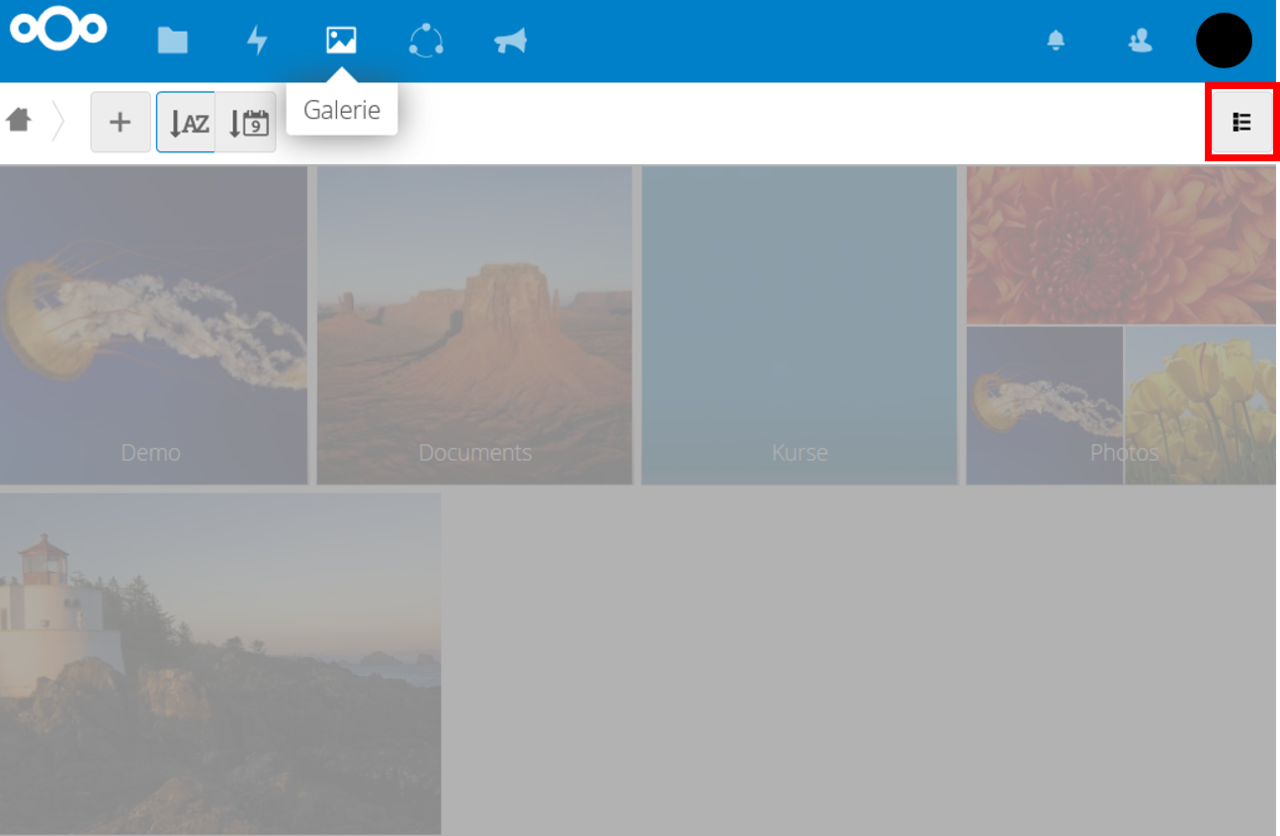
In the title bar you can click on the photo gallery, for example (3). Photos can be sorted alphabetically or by time. Clicking on the symbol closes the area again.
Sharing files
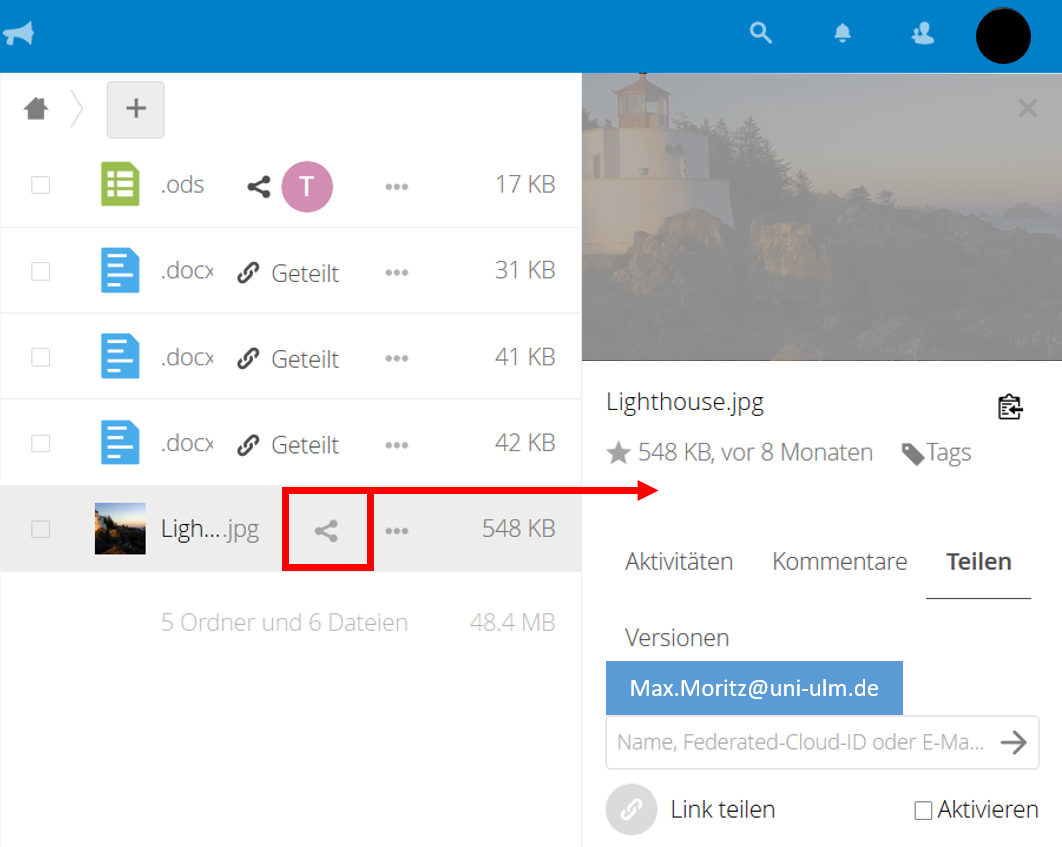
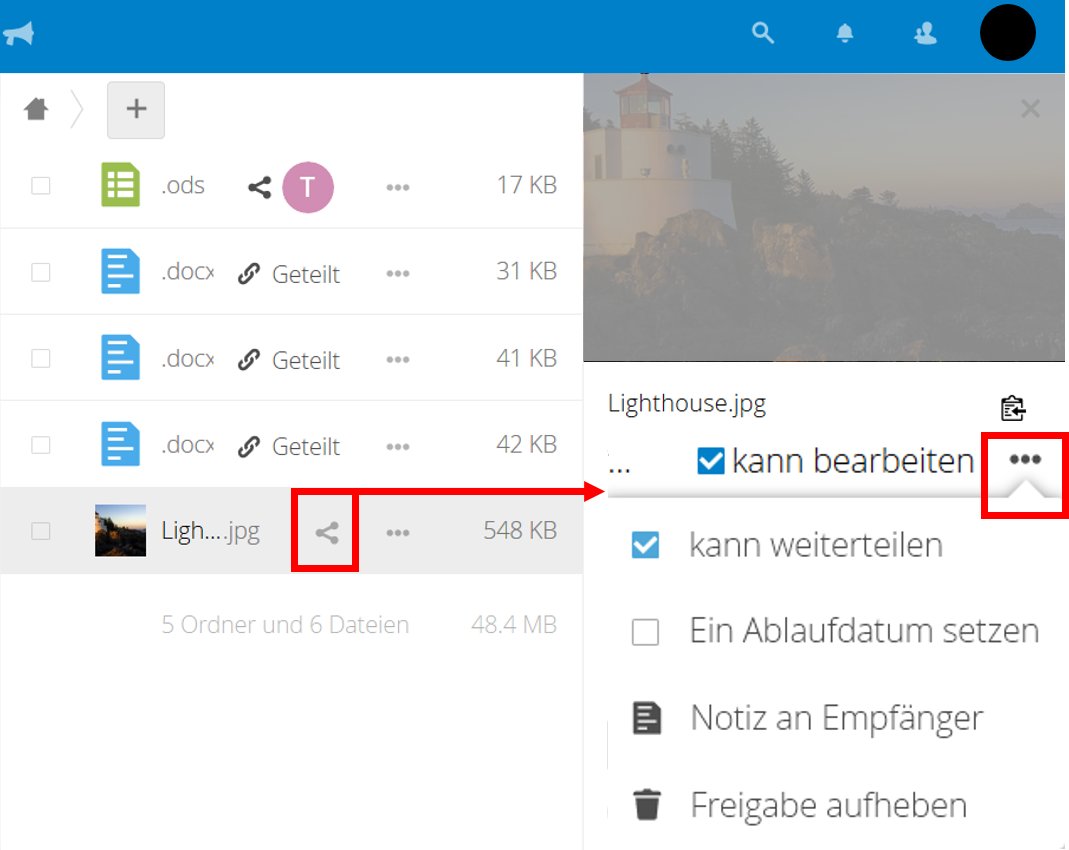
By means of the symbol, the sharing of files is possible: The corresponding area opens. The person with whom the file is to be shared is selected via his or her user name or e-mail address (1).
Furthermore, it can be arranged that the person can edit and forward the document (2). An expiry date can also be set.
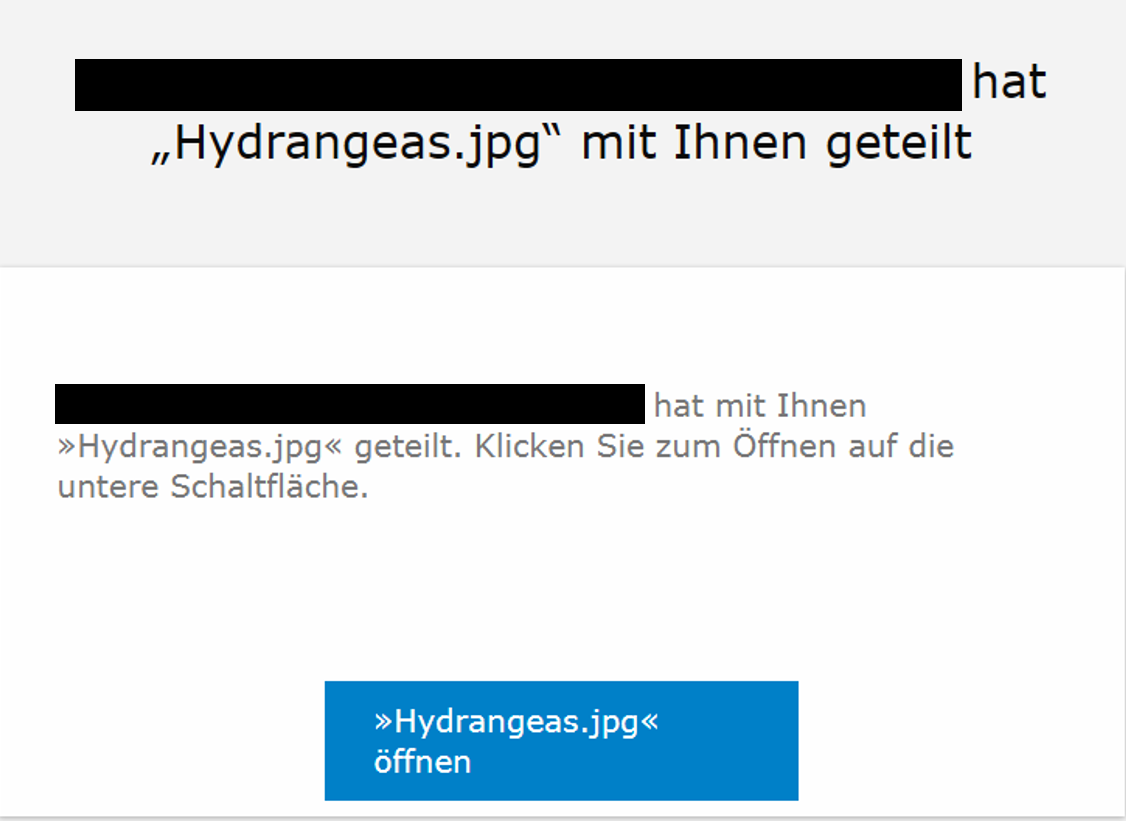
The person receives an e-mail requesting them to click on the file (3). Members of the University of Ulm must first log in to the CloudStore.
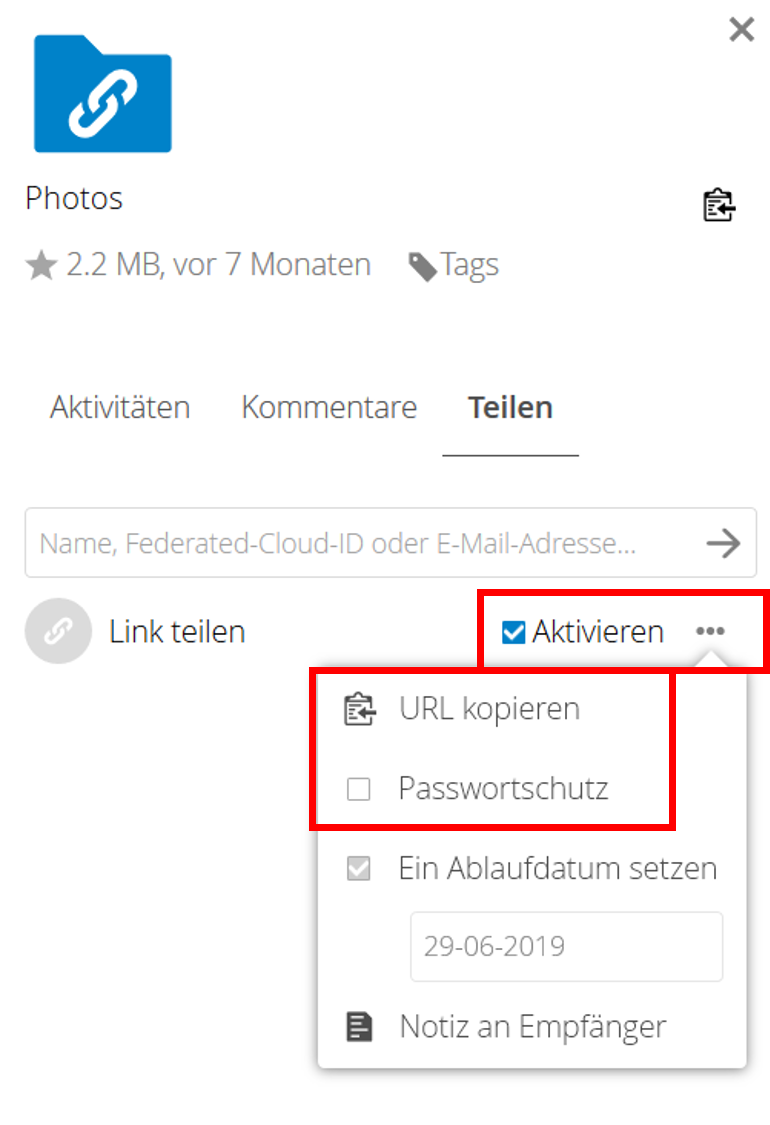
Files can also be shared with external persons, i.e. non-members of the University of Ulm, via their email address (4). To do this, the URL generated must be copied and communicated to the recipient. Password protection is mandatory in this case. The password must be given to the person before opening the file.
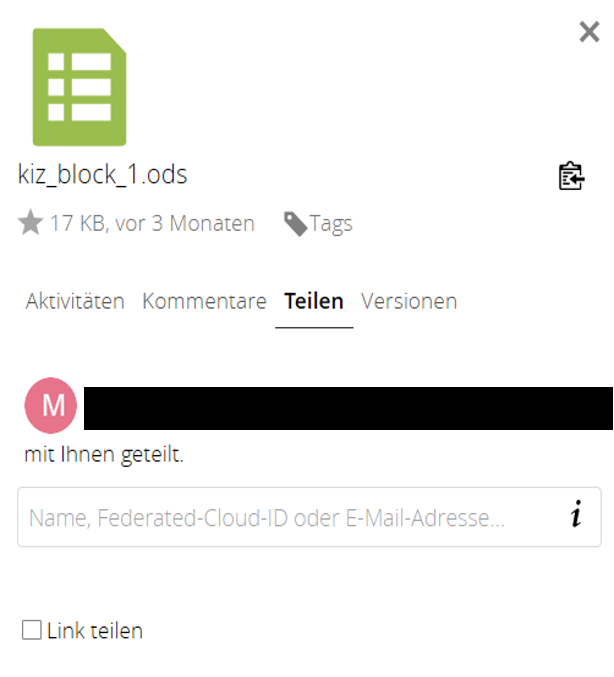
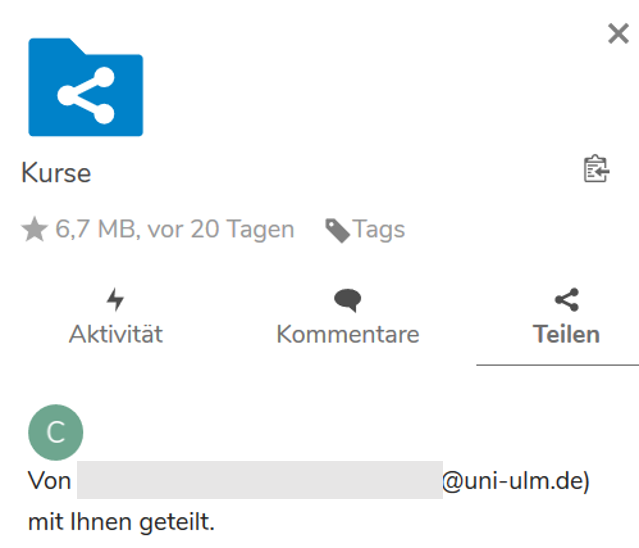
If someone has shared something with you, you will receive a note with the link (5).
Working with files
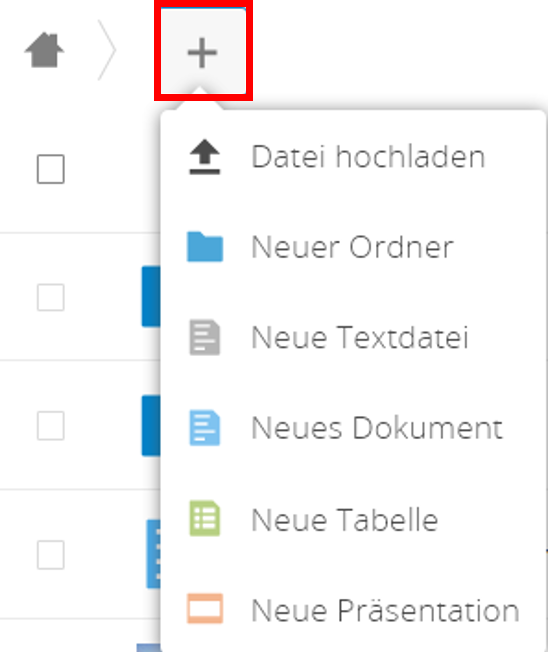
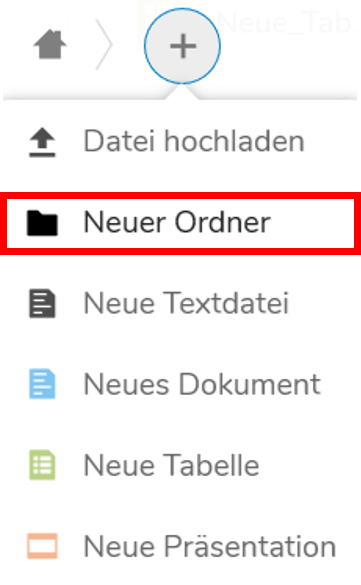
Use the (+) symbol to open the menu to upload files or create new folders (1). OpenDocument files can also be created: Texts, tables or presentations.
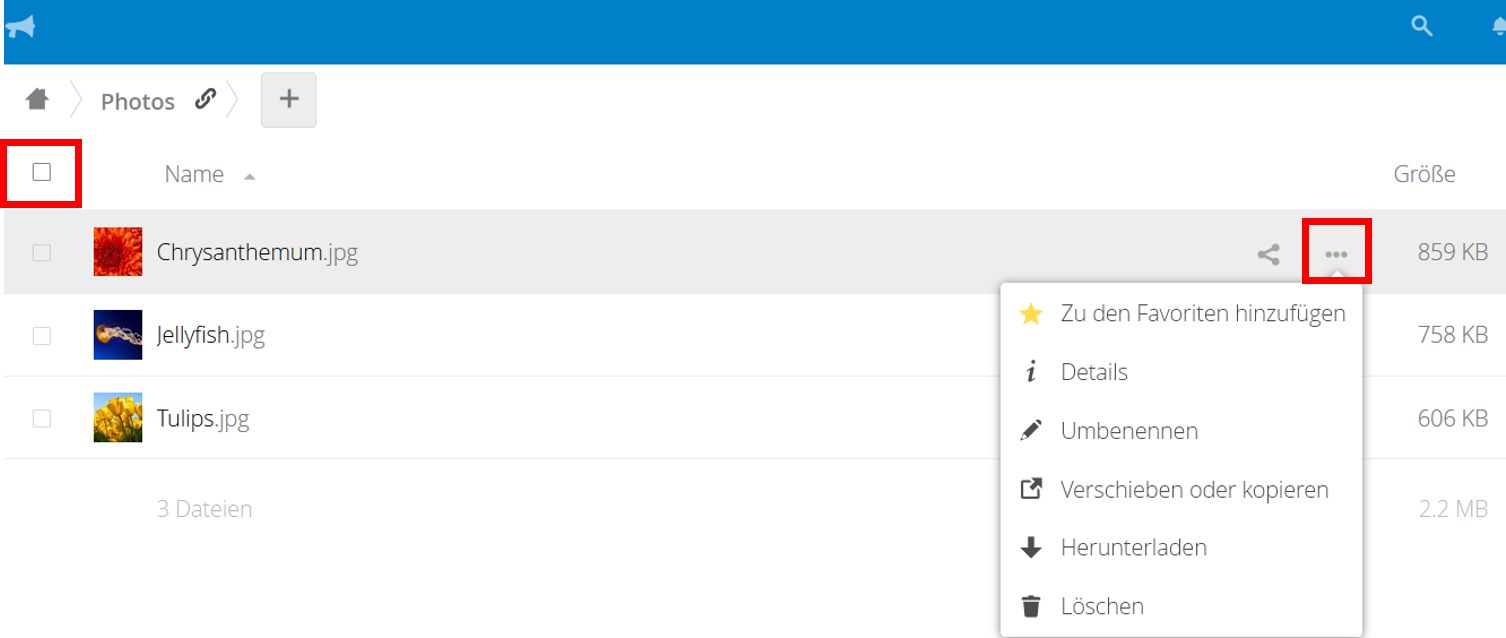
Further file operations are accessed via the menu, including renaming, moving and copying (2).
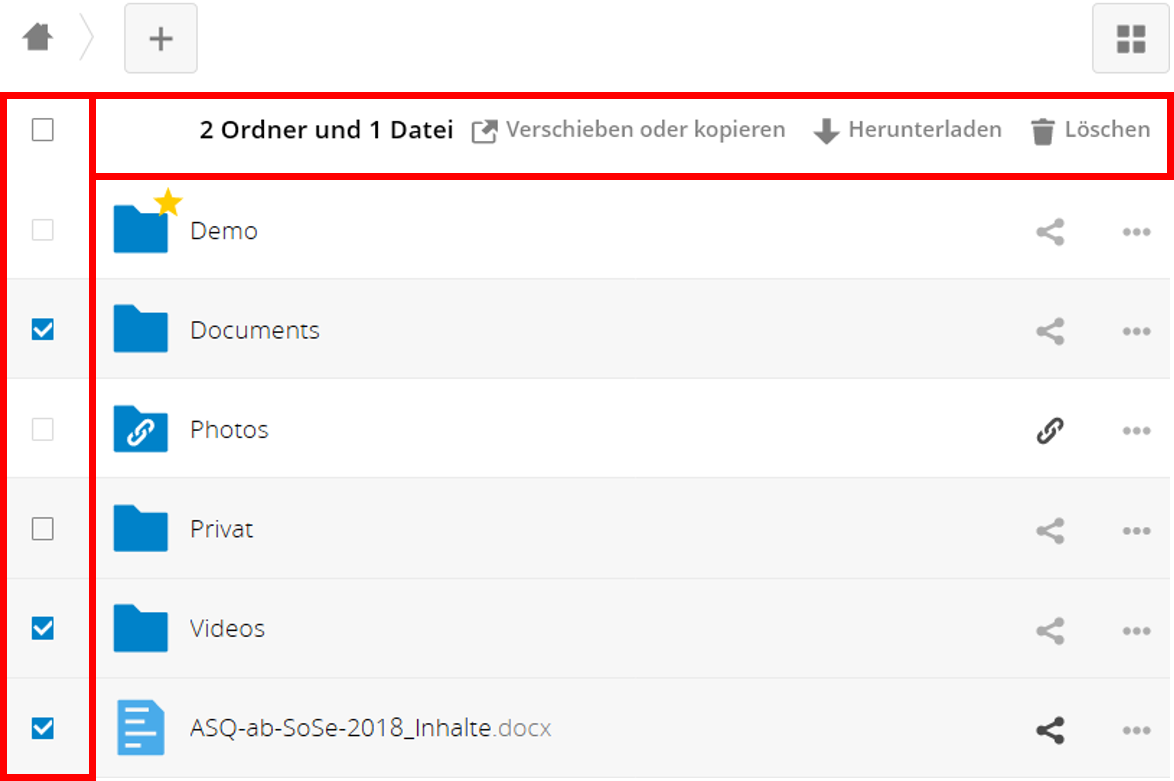
Multiple selections activate different file operations, e.g. moving, copying or downloading, etc. (3).
Collaborative work I: Editing documents
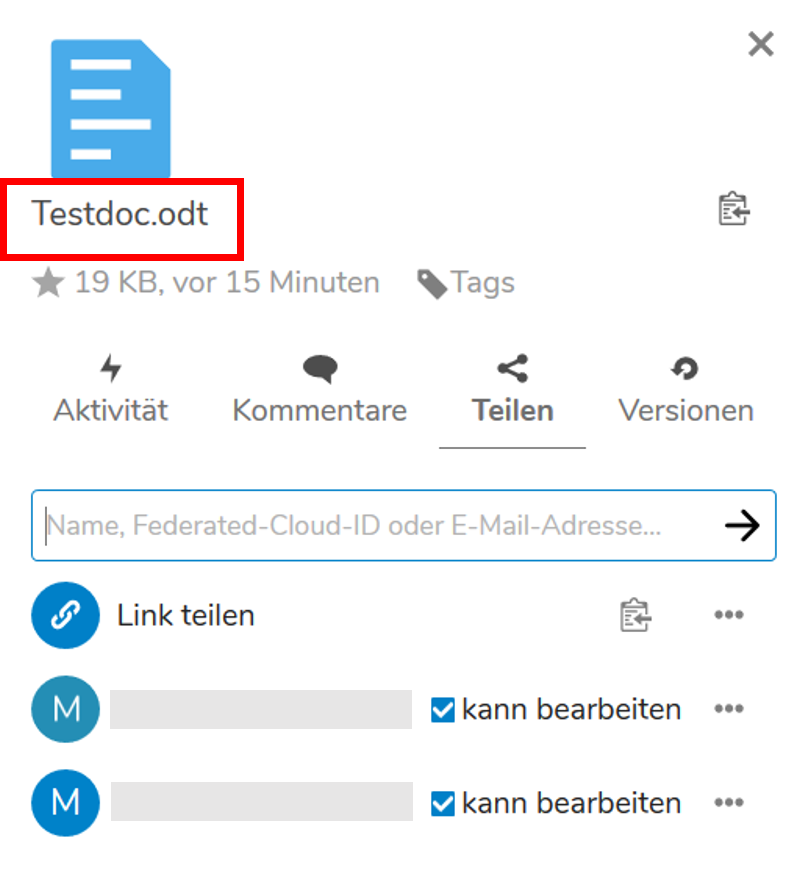
The CloudStore offers various possibilities for collaborative work or group work. For example, a document can be edited and commented on in real time by different people on the web. These are OpenDocument files (with the extensions .odt, .ods and .odp, 1). The prerequisite is that there is a person who shares the document with other people and allows editing (here Testdoc.odt, 2):
-
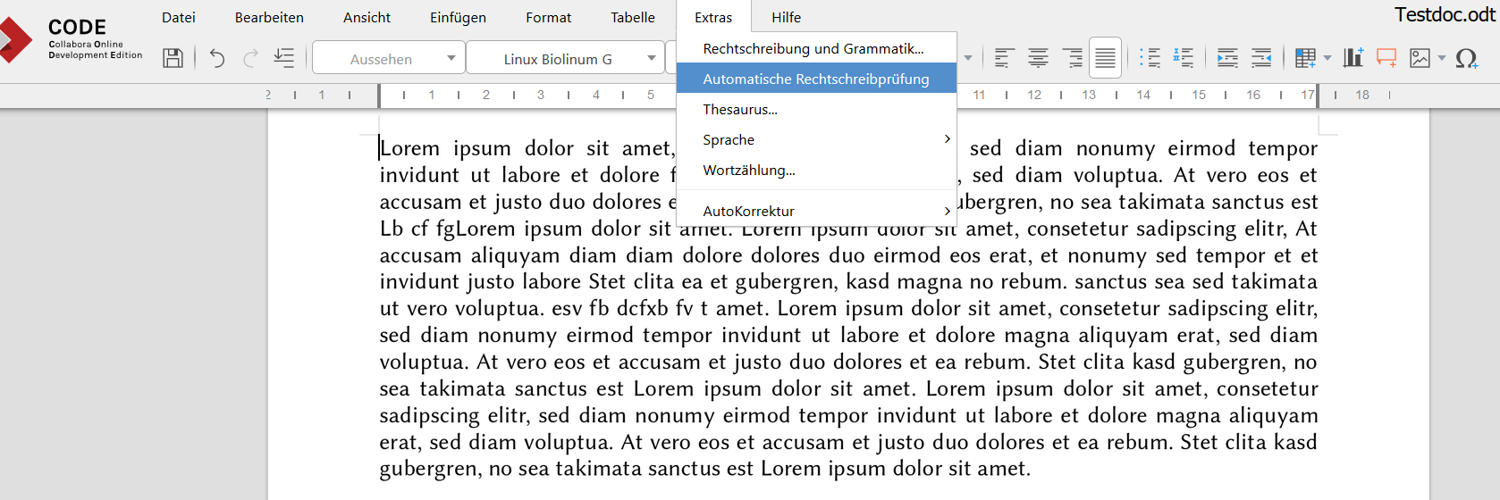
After opening a document, it may be helpful to deactivate automatic spelling (3). At the end of the work, the spelling checker can be switched on again. (The general deactivation under Tools > Spelling and Grammar > Options, only works per session). Select a suitable font and font size. From today's point of view, the "classics" among the fonts Arial and Times New Roman have become obsolete. If you are free to choose, it may also be Linux Biolinum, for example. Just try out the fonts offered by Collabora Online!
-
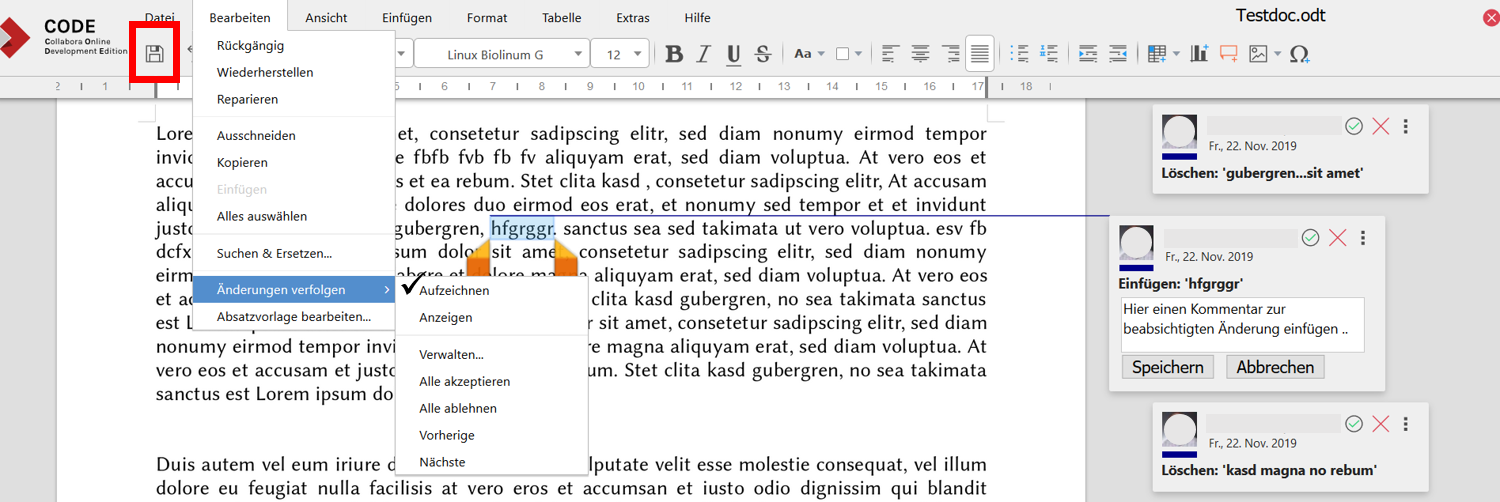
To be able to track changes to a document, the log mode must be switched on. Select Edit > Track Changes > Record (4). Any changes a person makes, such as inserting or deleting text, are displayed in the margin on the right. The proposed changes can be accepted or rejected (green/red). Changes can also be accepted or rejected globally. In addition, each suggestion made by another person can be commented on, making it possible to edit documents together in real time. As always, do not forget to save at the end (diskette symbol)!
- During editing, you have the usual functions of a word processor at your disposal: font and size, bold, italics, underlining, paragraph formats and so on:
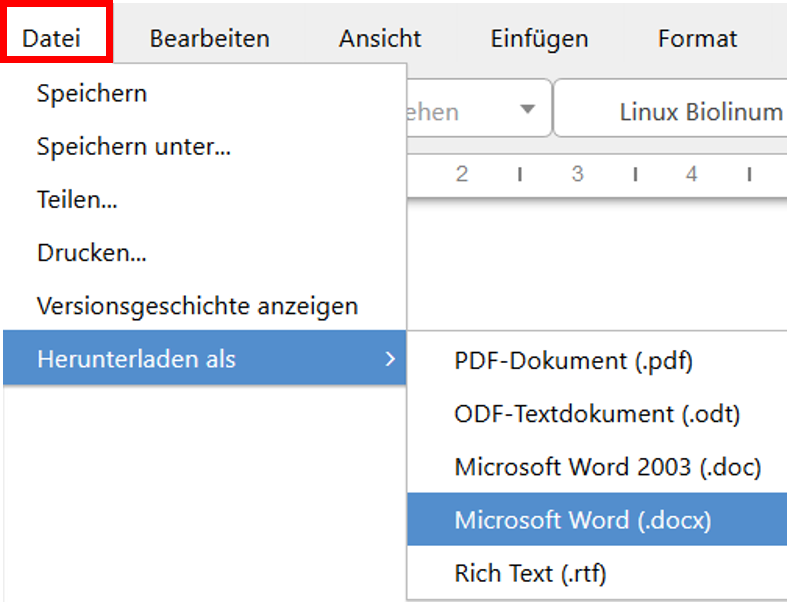
- File tab: The document can be saved as a PDF or in Word format (5).
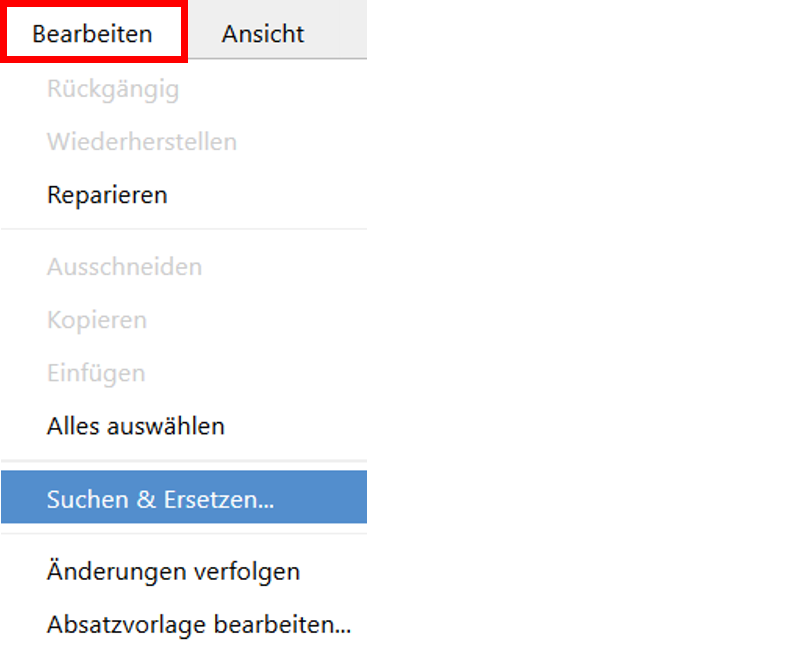
- Edit tab: Undo, search & replace and track changes are important (6).
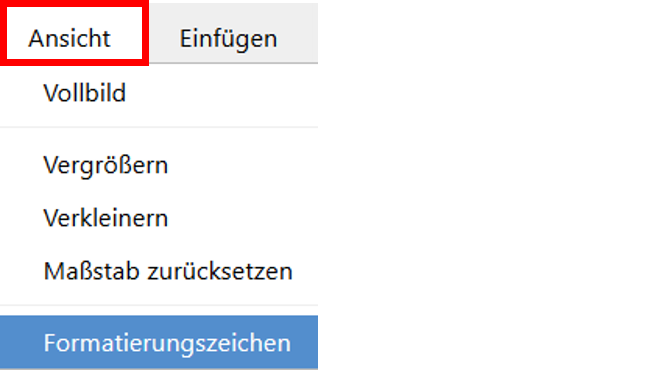
- View tab: There is the possibility to set full screen and to enlarge or reduce the document (7). With Formatting Characters all characters of the OpenDocument are displayed.
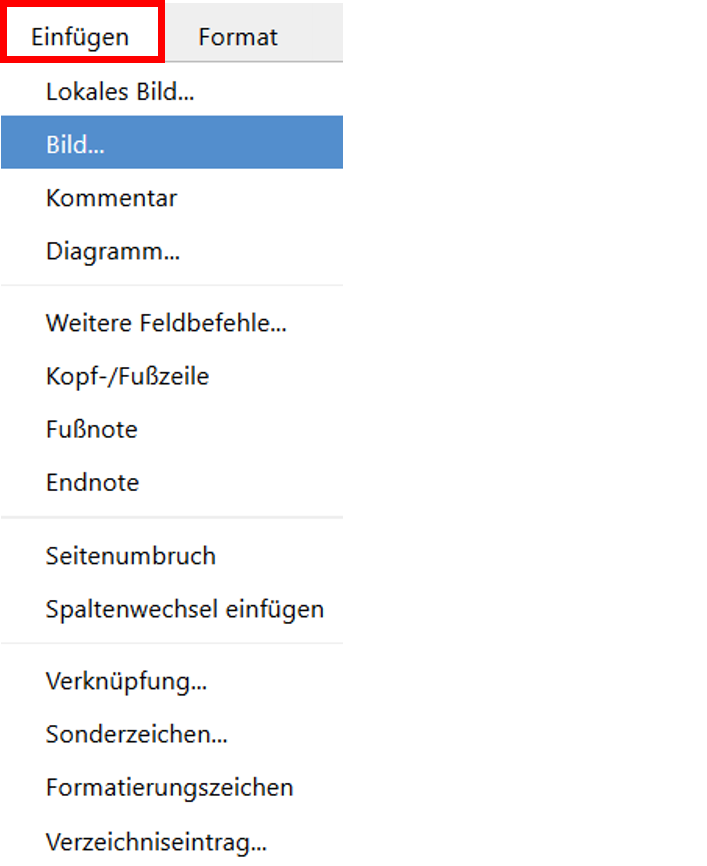
- Insert tab: Local Image... loads images from the CloudStore, Image... loads images from the local system (8).
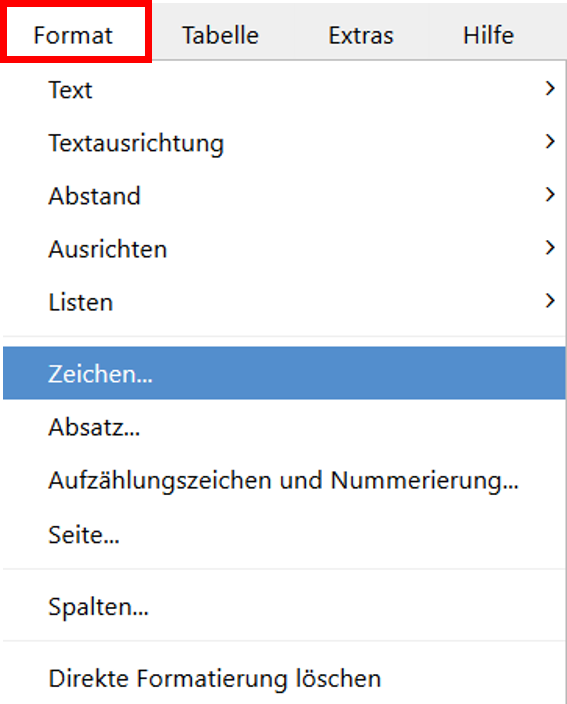
- Format tab: covers all format actions, from characters, paragraphs and lists to aligning objects (9).
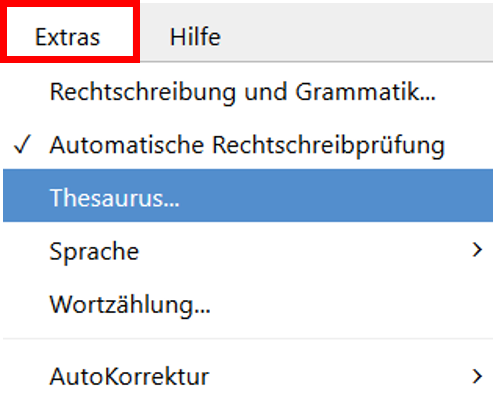
- Extras tab: here you will find, among other things, the settings for the spell checker (10).
Collaborative work II: Sharing a folder
You can share folders with one or more people in your team. You and the persons concerned can then fill these folders with materials. Everyone can access the materials if they have been released for editing. To share a folder with others, the following steps are necessary:
- Create a new folder and name it (1).
- Share the folder with one or more persons (e.g. persons in your team, 2). You can recognise a shared folder by the typical sharing symbol. You and others can now fill the container.
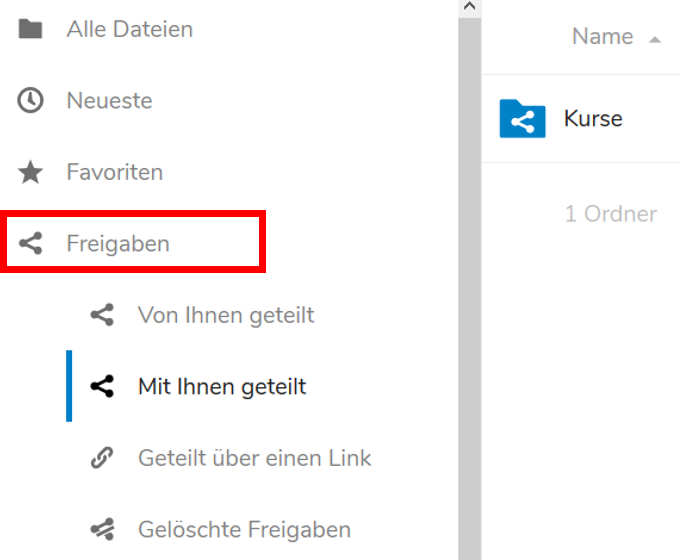
- Via shares you can see whether and which folders or files have been shared with you (3).
Working with tags
Tags are keywords that can be used to search for documents.
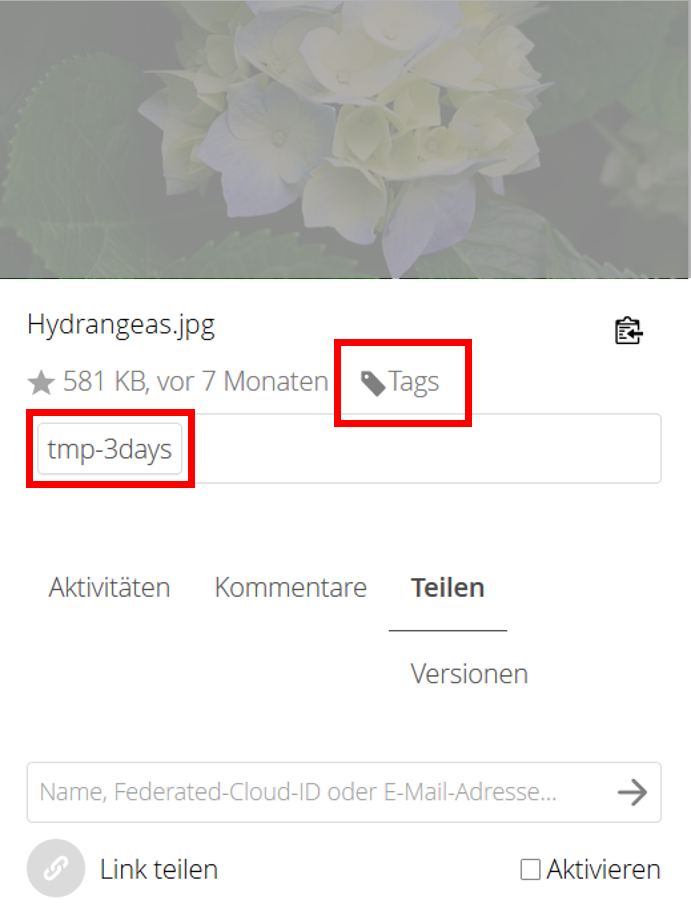
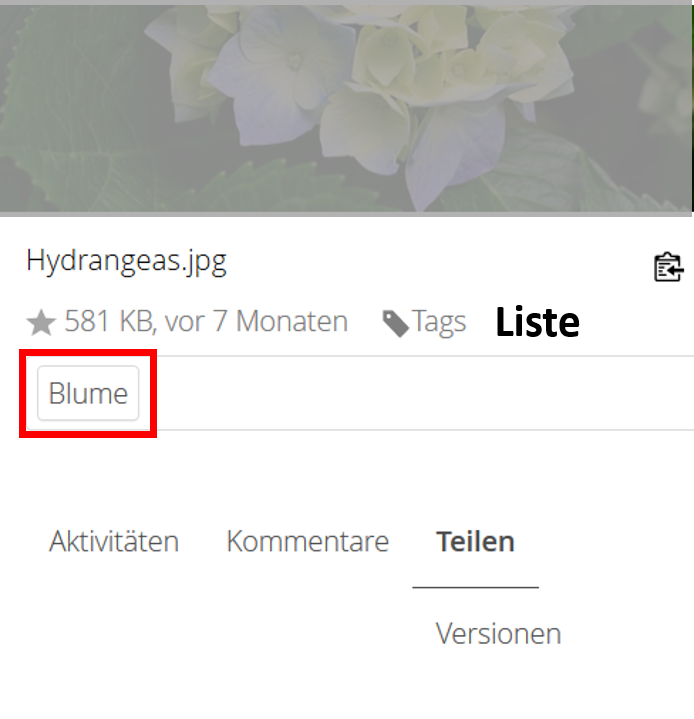
The tags tmp-3days and tmp-7days are used to set a so-called "expiration date" (1). Files or folders are deleted after three or seven days. These deletion routines are preset from the administrative side.
For example, plants could be given the attribute 'flower' and searched for (2). Or: You could 'tag' landscape pictures with the name of the respective country (e.g. Germany, France ..) and thus view them in a filtered way without having to store the files in the same folder.
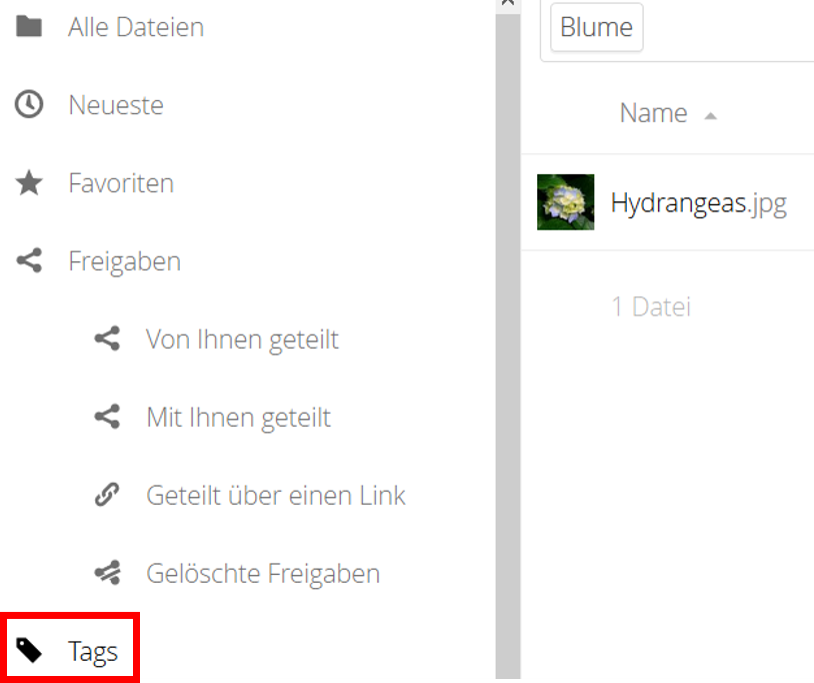
You can then search for such files on the start page with the help of the 'Tags' tab (3).
Please note that the tags you create are currently publicly visible.
Circles
By means of circles, it is possible for users to create their own groups. Group members can be, for example, other users, colleagues or friends. The circles created can be used to share files, exchange messages, etc. The following types of circles can be created:
Public circles
A public circle is a public group that is visible to all users. Any user can see and join the group.
Personal circles
This is a list of users known only to the creator of the circle. This circle can be used to exchange messages or files with the same group of users.
Closed circles
A closed circle requires an invitation or confirmation from an administrator of the group. Such a circle is the best choice if you should handle sensitive data.
Secret circles
Secret circles are protected with a password. Such a circle is especially recommended if you do not want your circle to be displayed as a public circle.
Create a new circle
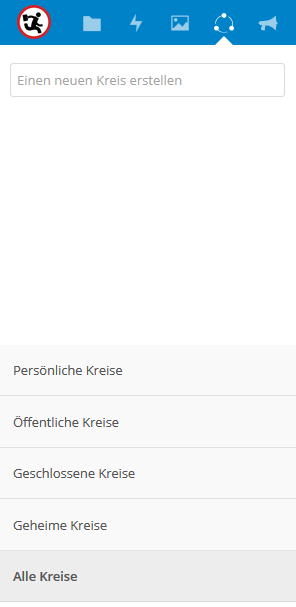
To create a new circle, click on the "Circles" icon in the toolbar, as shown below (1):
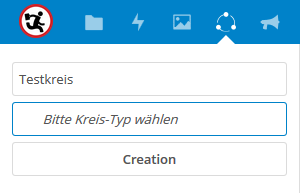
In the field "Create a new circle" you can now determine the name for the circle. As soon as you have entered a name for the circle, the view changes as follows (2):
In the field "Please select circle type" you can choose from the categories shown above. A click on "Creation" creates the desired circle.
Manage created circles (3)
Once you have created the circle, you have the following options:
- Add a member
- Add a group
- Delete a circle
- Edit a circle.
Manage members (4)
You can add users using the Uni Ulm email address or the regular name. You can then manage the level and also the status of the respective members of the circle.
Under the Level tab, you can determine which rights the respective user should have. You can choose between member, moderator, administrator and owner. Under the Status tab, you can remove a member from the circle.
Settings
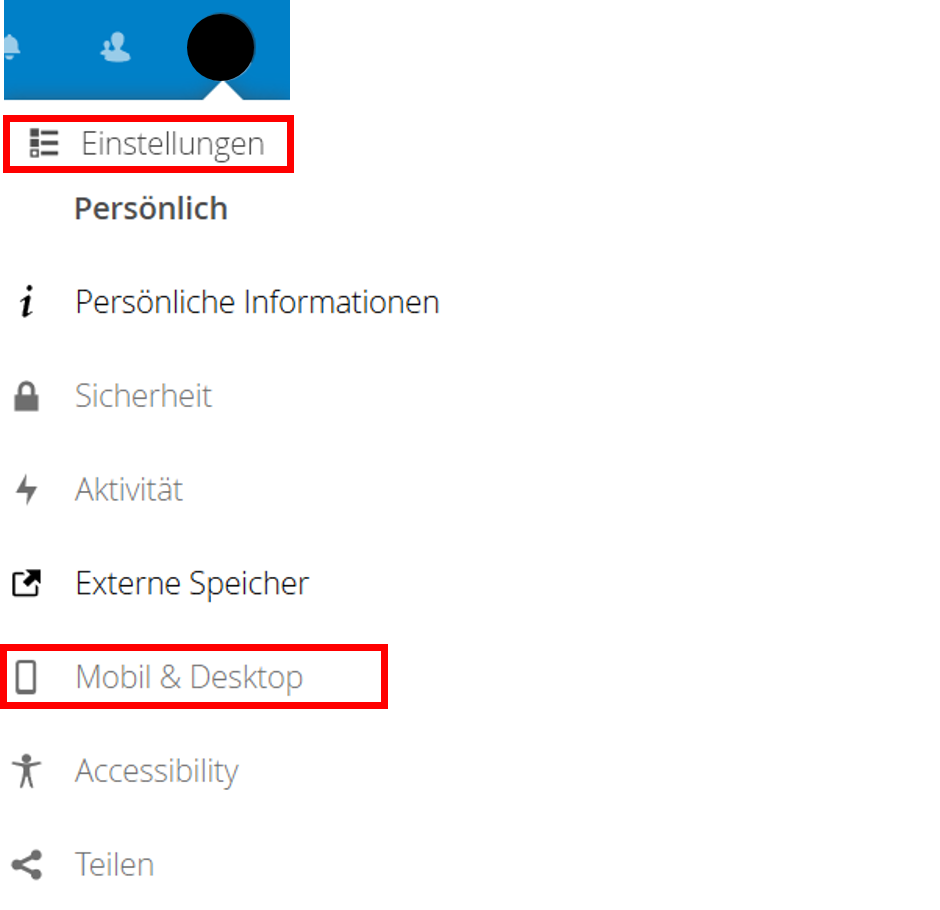
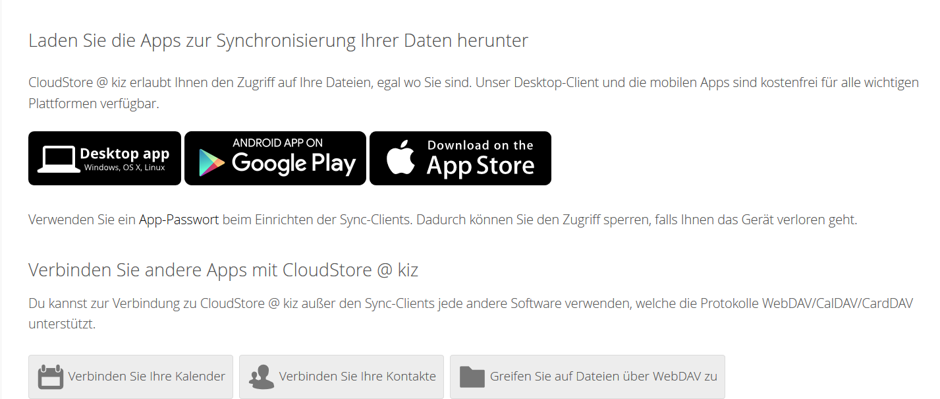
Under Settings you will find the links to download the mobile and desktop apps (1 and 2).
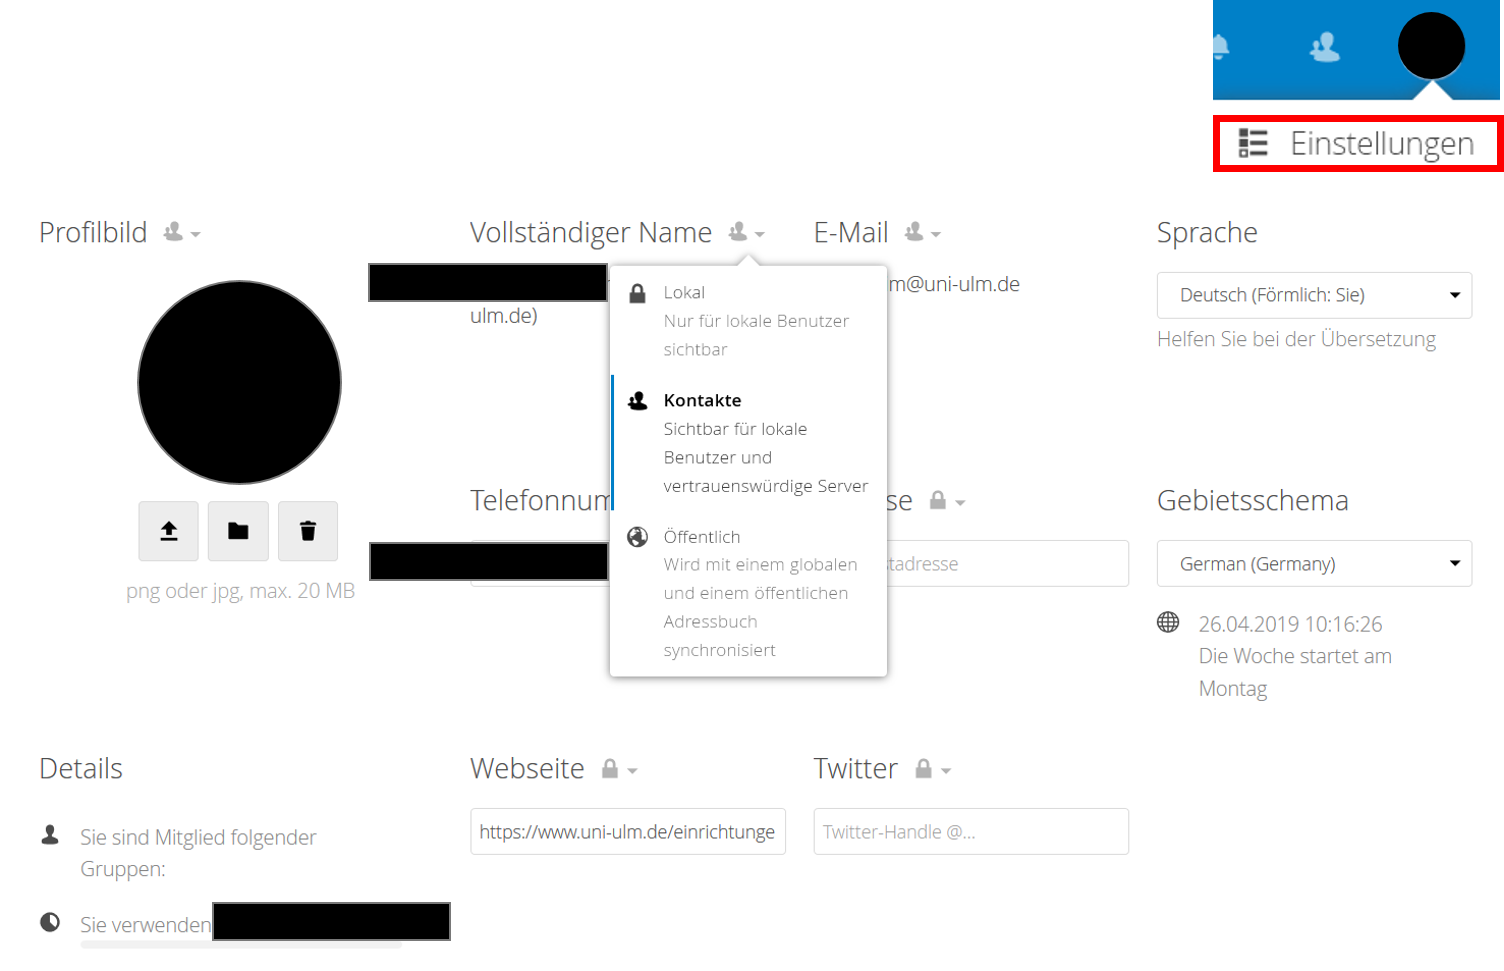
Here you can load your profile picture and configure your personal settings (3).
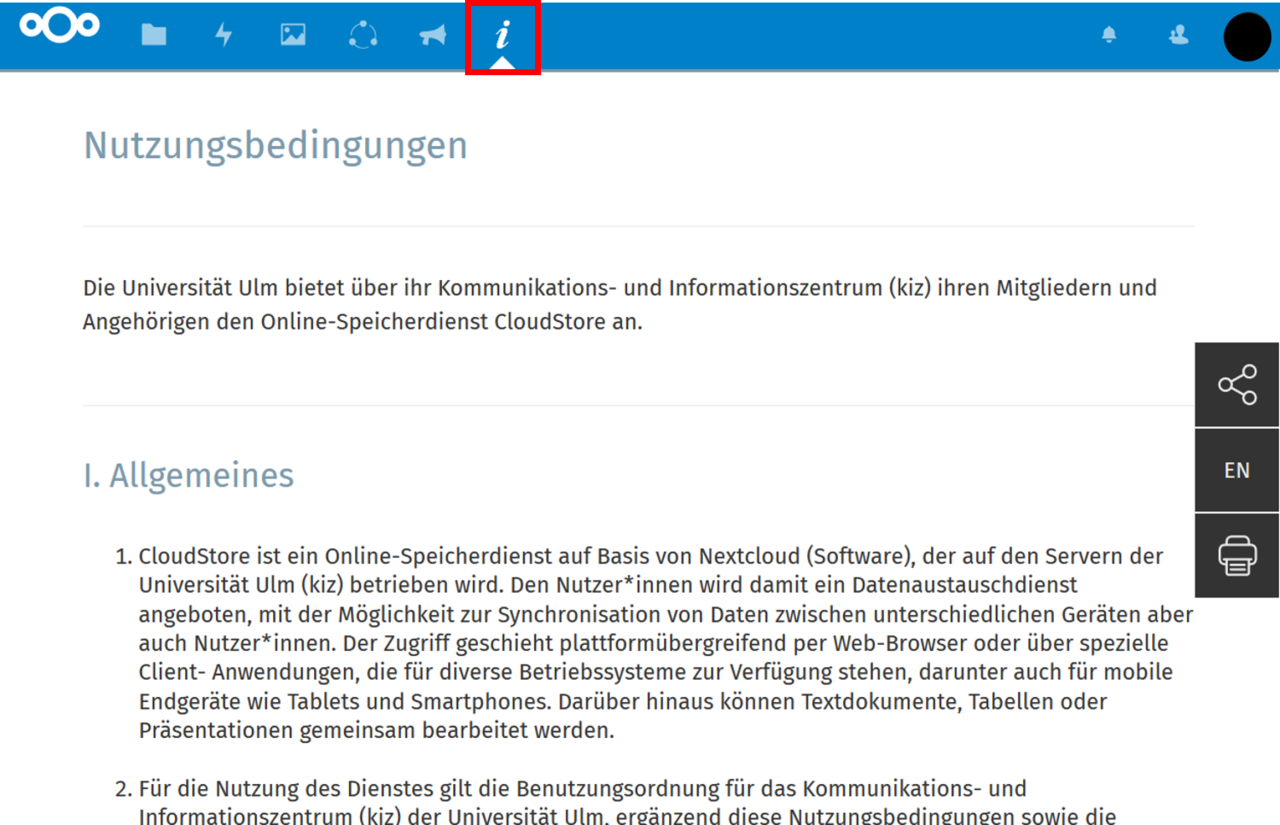
Please read the terms of use for the CloudStore service carefully (4).
Communication and Information Centre (kiz)
Please contact us if you have questions or problems related to the kiz services:
Office hours
Monday - Thursday
09:00 h - 12:00 h and 13:00 h - 15:30 h
Friday 09:00 h - 12:00 h
Phone
+49 (0) 731 / 50 - 30000
Telefax
+49 (0) 731 / 50 - 1230000
Order a Callback
helpdesk(at)uni-ulm.de
Support Portal (Uni internal)
[more]
Service Points are locations where you can visit us personally.
Using self-service functions of the Identity Management System (IDM): Administer permissions, subscribe to services, change passwords.
Research in the library stock: monographs, textbooks, magazines, university publications, e-books, e-journals, national licenses, and the contents of the institutional repository OPARU.
With about 400 keywords you will get direct access to our services. If something isn't listed, please contact our Internet Editorial Office.


![[Translate to english:] (4) Mitglieder verwalten [Translate to english:] (4) Mitglieder verwalten](/fileadmin/website_uni_ulm/kiz/it/cloudstore/bilder/bild29.png)
